The Next Step
Greetings to all who read the series of publications “My smart home. From the beginning, step by step to… ”. In a previous article, I described the process of installing Home Assistant and its first settings.
Today we will describe how to add and configure additional software components – File Editor, Terminal. Make the first changes to the main configuration file: configuration.yaml. Let’s update Home Assistant to the current version.
So, let’s move on!
Software add-on: File editor
In Home Assistant, many parameters can be configured through the user interface, but there are enough of them, which are in the .yaml configuration files. So we need a tool to edit them.
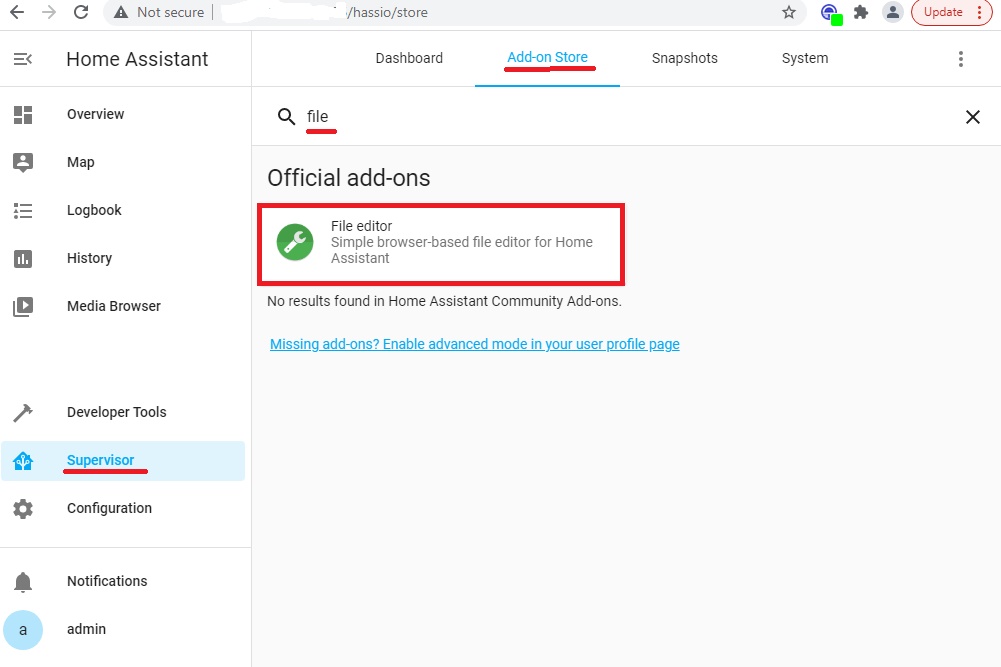
You can find and install this official Home Assistant component by selecting the Add-on Store tab in the Supervisor section and entering the word File in the search field:
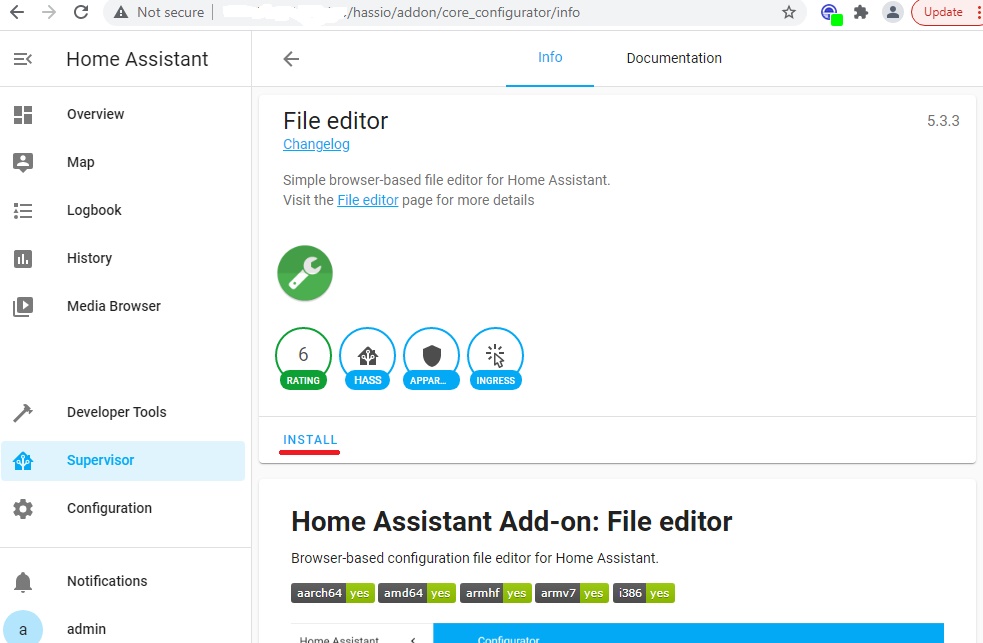
Next, select Install:
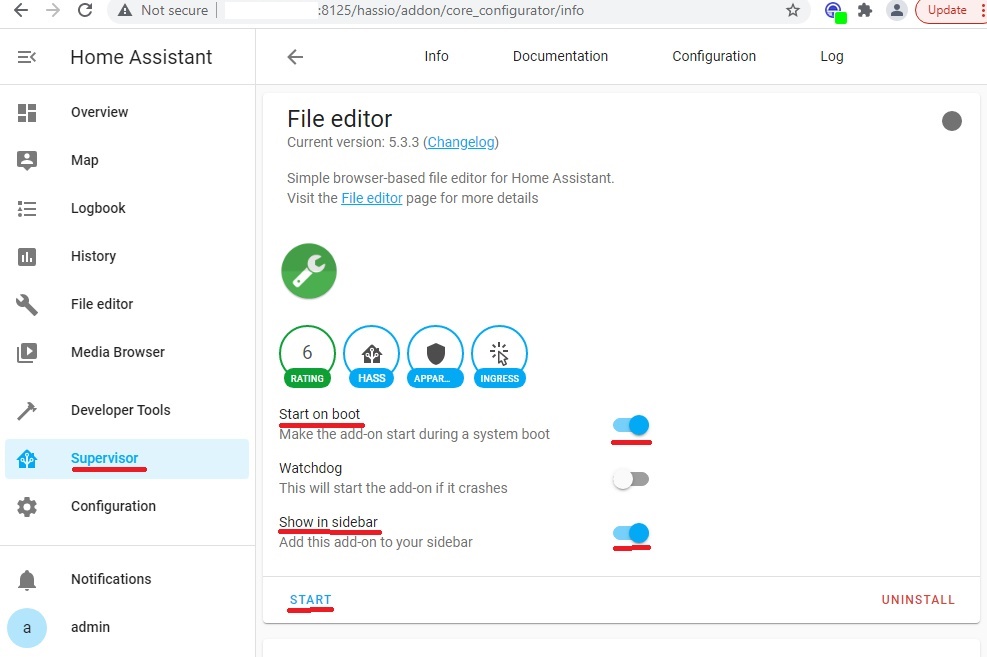
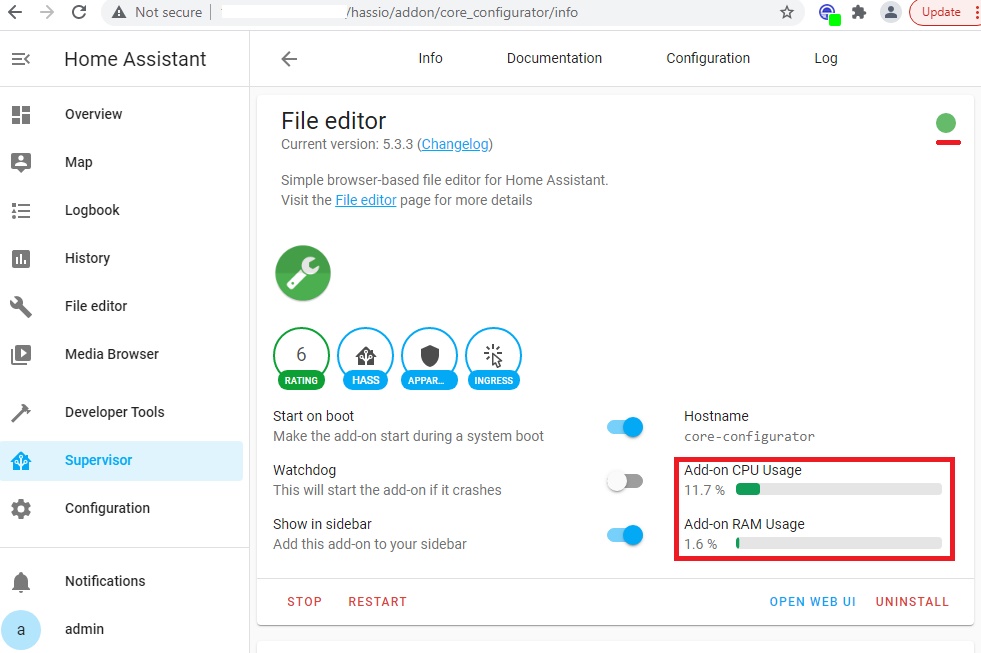
Next, check the Start on boot option. It must be on. Optionally, we can enable the Show in sidebar option – display the File Editor menu in the Navigator on the left. We start the component:
If the start is successful, this will be indicated by the corresponding green indicator at the top right. There will also be indicators to monitor the load of this component of the processor and memory:
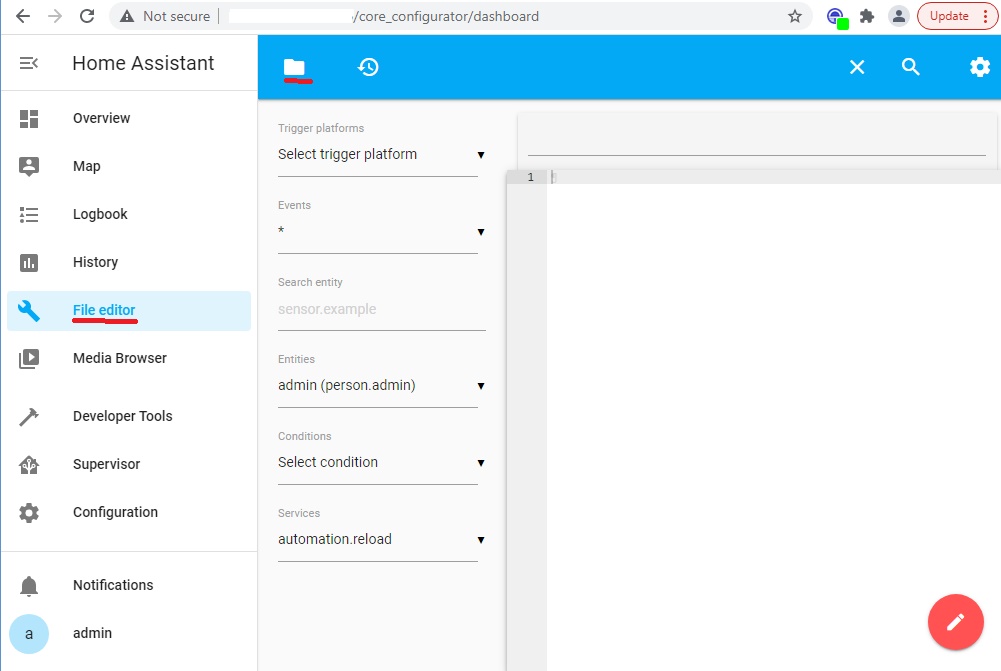
When the File Editor component is successfully installed, open it via the link in the left navigator. Select the shortcut Browse Filesystem, and open the main configuration file: configuration.yaml:
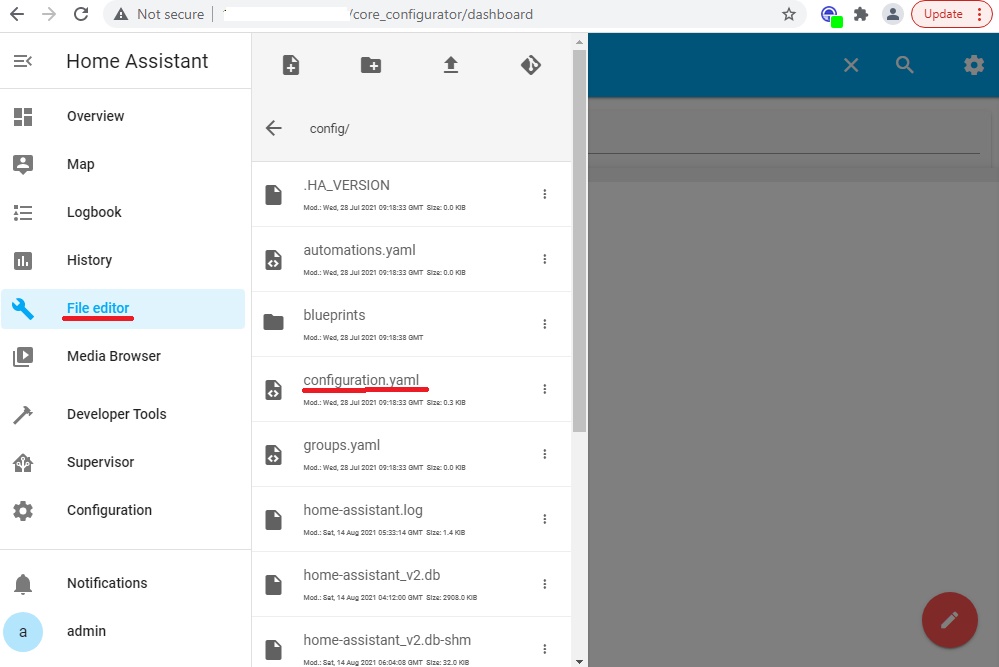
This file now contains the default settings. There are not many of them. And we will gradually make our parameters there.
Configuration file: configuration.yaml
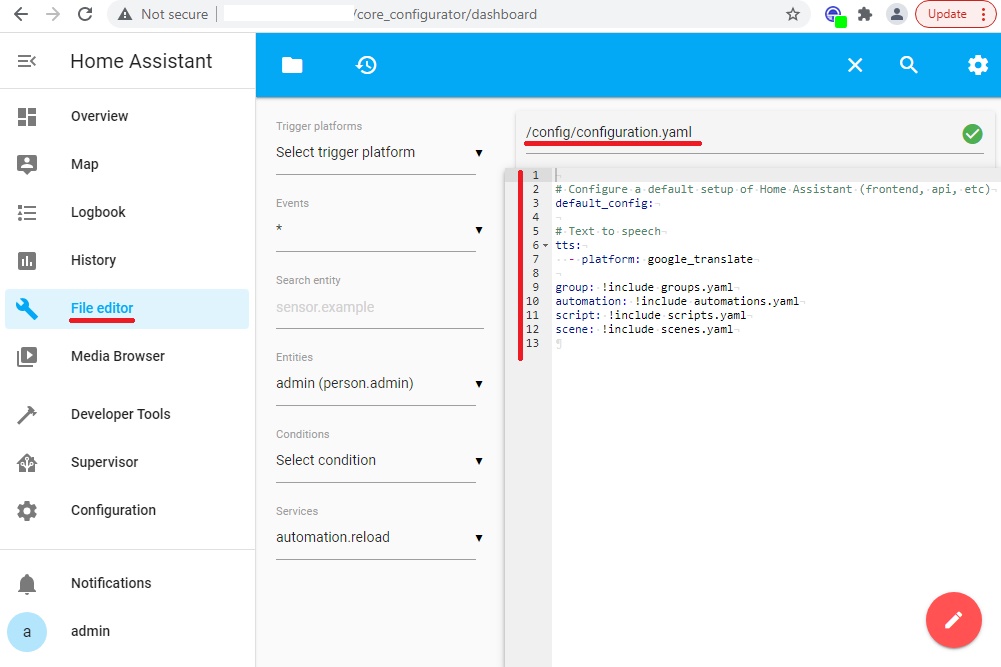
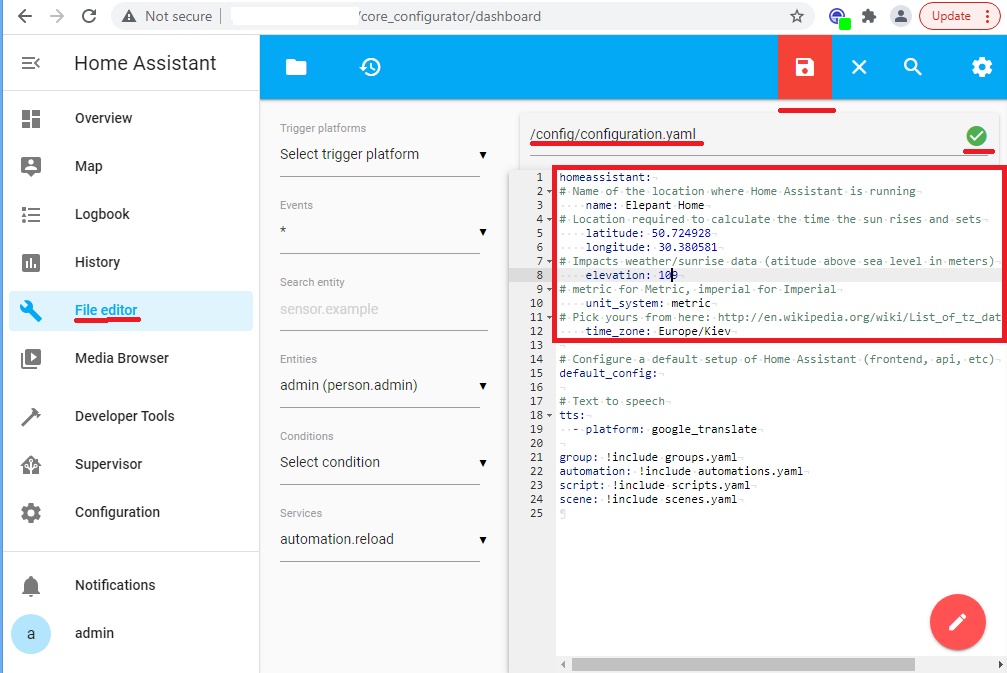
Let’s start editing the configuration.yaml file. Enter the following parameters:
homeassistant:
# Name of the location where Home Assistant is running
name: Elephant Home
# Location required to calculate the time the sun rises and sets
latitude: 50.724928
longitude: 30.380581
# Impacts weather/sunrise data (atitude above sea level in meters)
elevation: 109
# metric for Metric, imperial for Imperial
unit_system: metric
# Pick yours from here: http://en.wikipedia.org/wiki/List_of_tz_database_time_zones
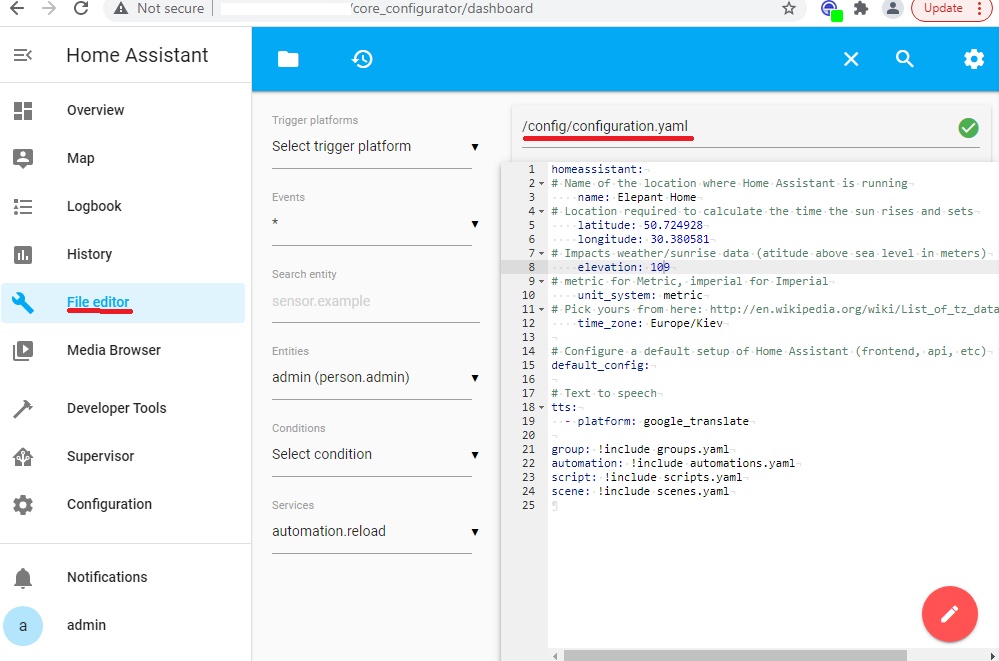
time_zone: Europe/KievThe green indicator indicates no syntax errors. Do not forget to save the configuration through the appropriate graphic menu item:
After saving successfully, this graphic element will disappear:
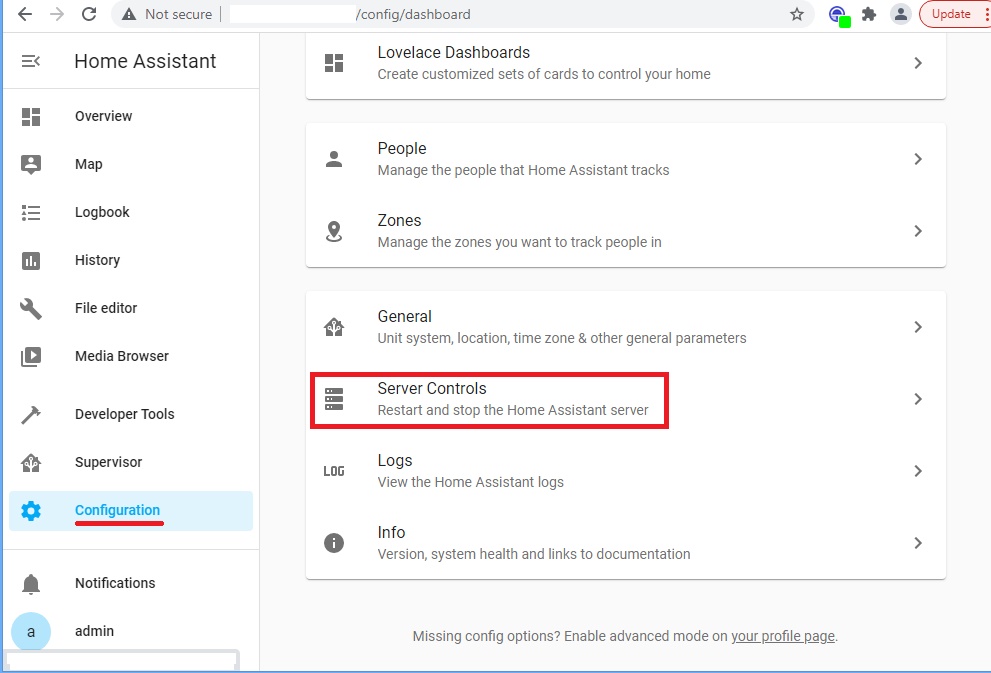
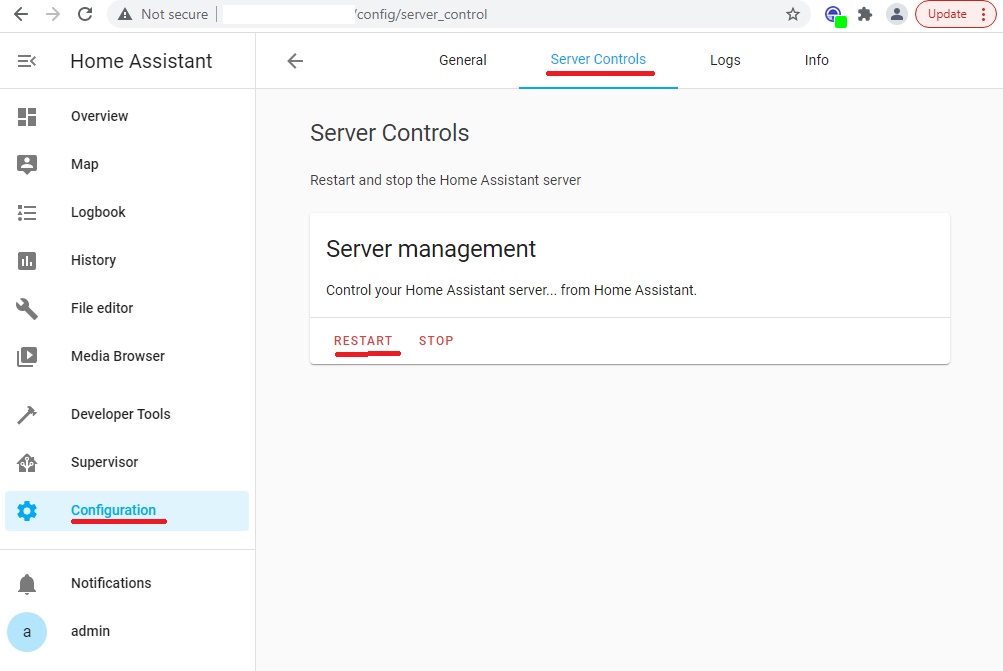
And to apply these added parameters, you must restart the OS Home Assistant. This can be done through the Configuration – Server Controls section:
Select the Restart option:
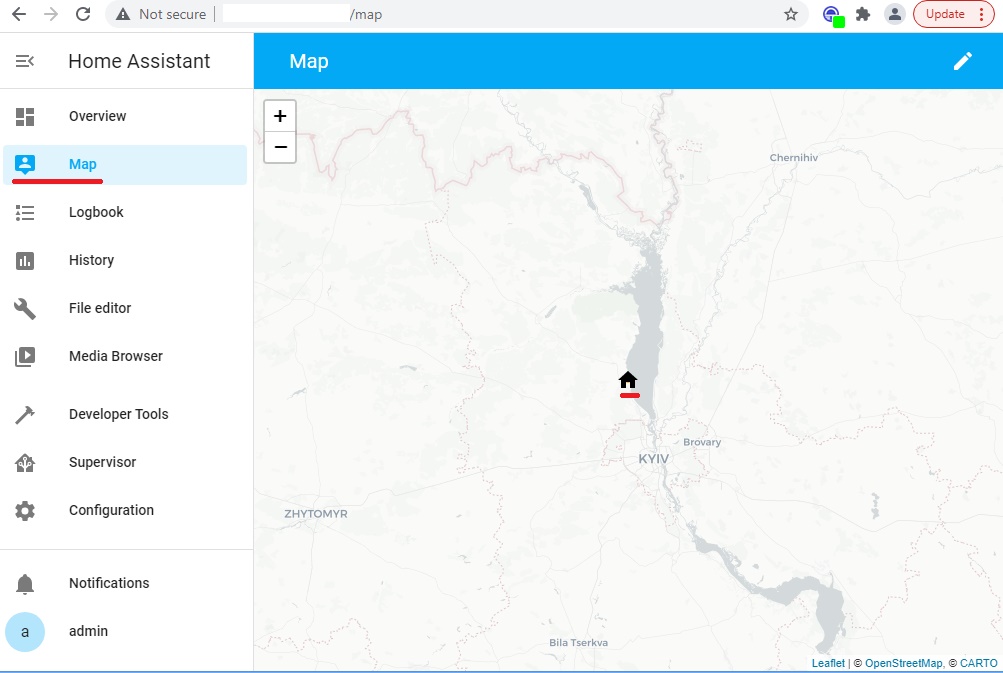
Communication with Home Assistant will be lost for a while. After restarting and reconnecting to web services, you can perform a small check of the added settings. To do this, go to the Maps section and see the location of your smart home on the map of OpenStreetMap:
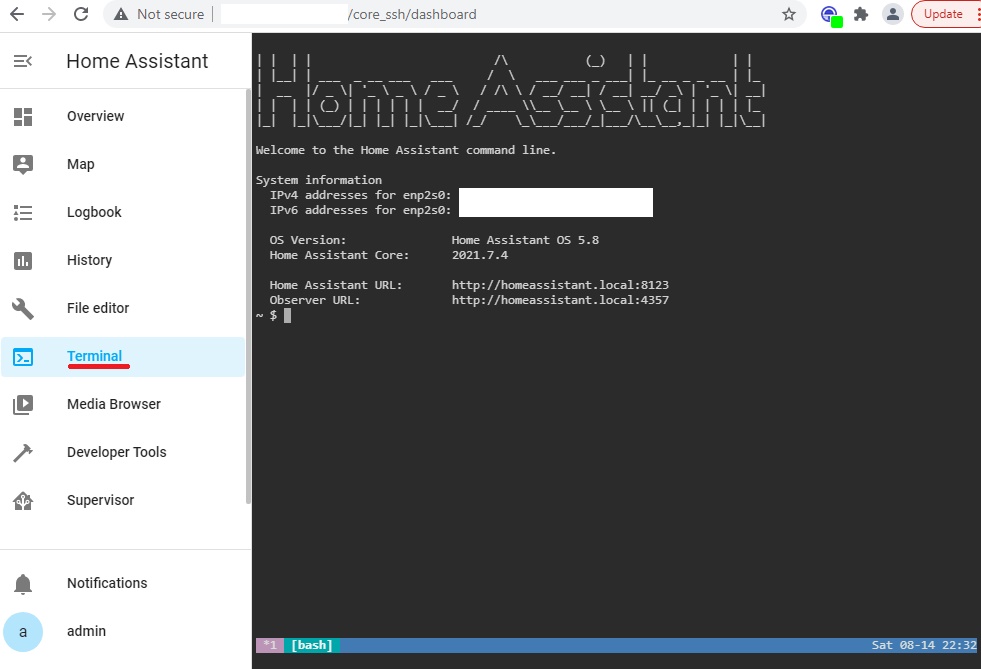
Software add-on: Terminal
Before proceeding to configure various integrations, we need another software application: a Terminal.
But before you can proceed, you must enable the Advanced Mode in user profile:

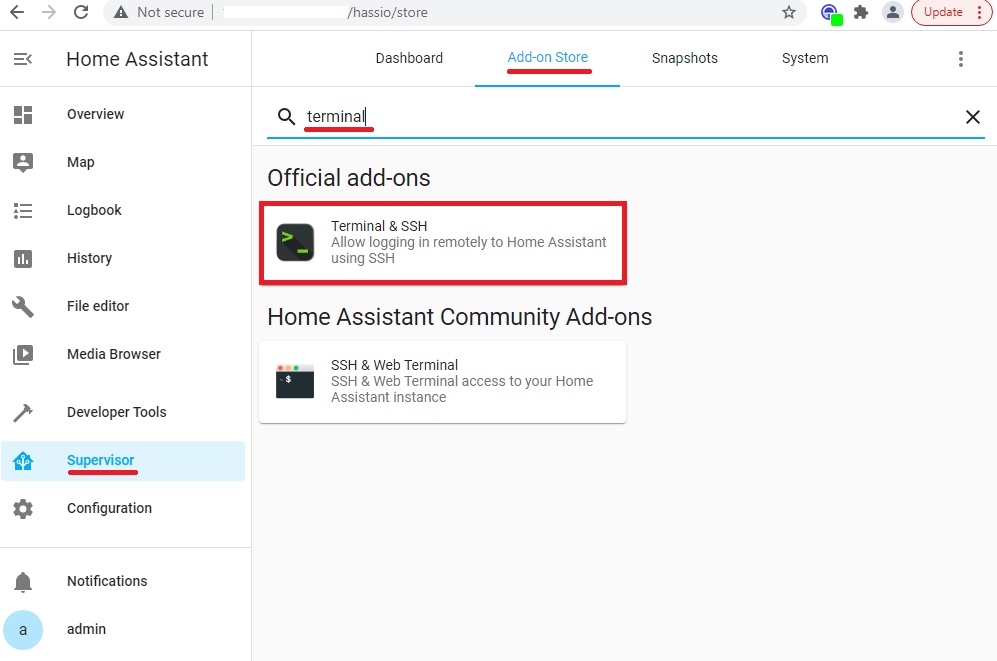
Now, Find and install this official Home Assistant component is similar to how we installed File Editor, only in the search box by entering Terminal:
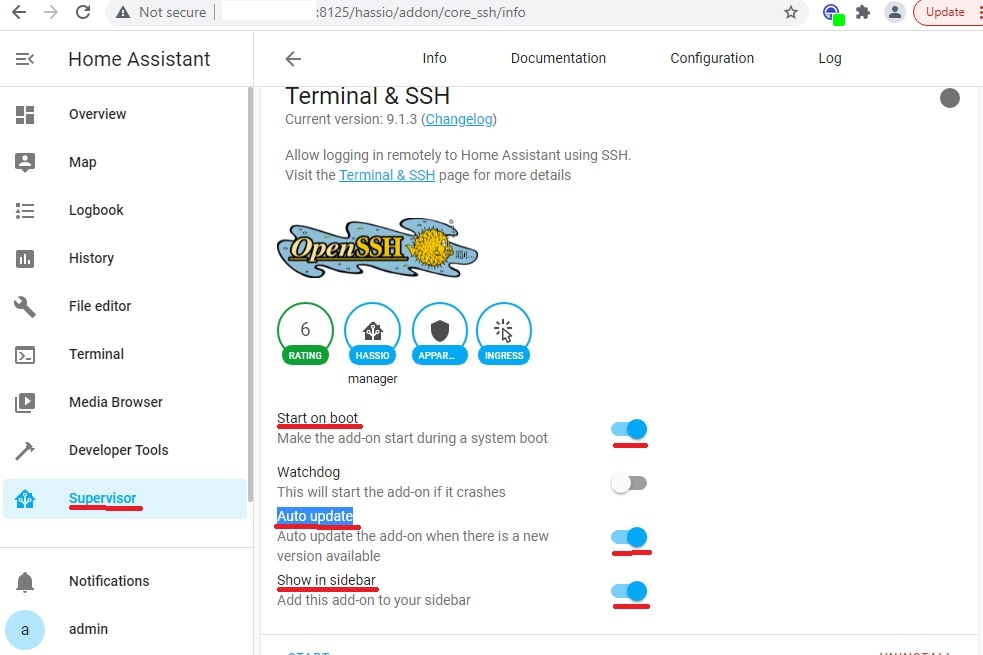
Additionally, enable the option Auto update. We start a component:
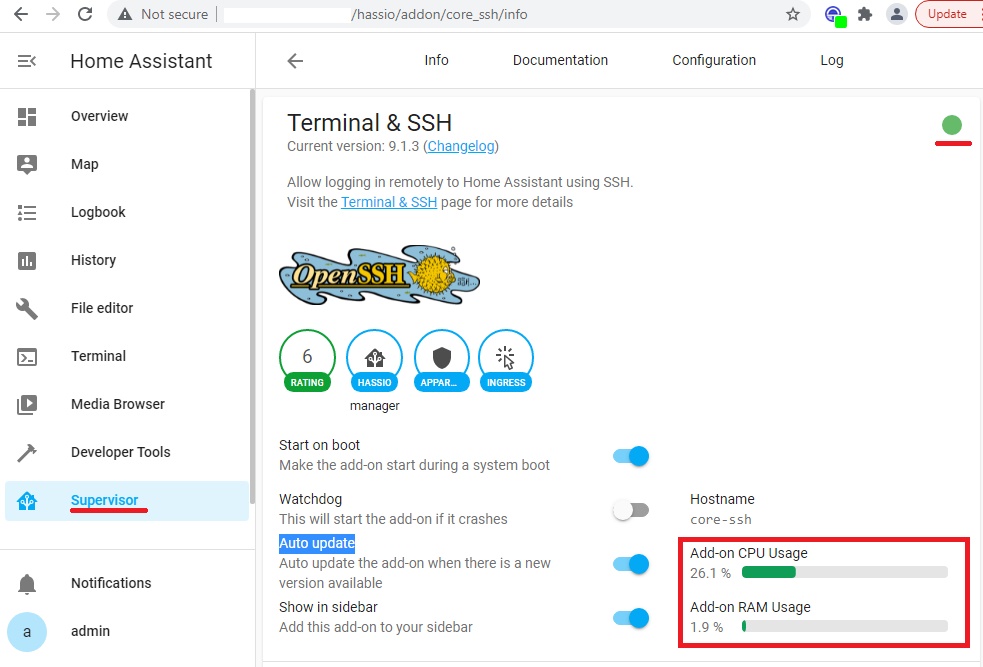
Similarly, after starting the component, the CPU and memory monitor indicators will appear:
You can check the operation of the installed application in the Terminal menu:
Upgrading Home Assistant components
Some time has passed since the establishment of Home Assistant. Updates to this platform are released regularly. So it’s time to upgrade the system.
The whole sequence of steps can be performed in two ways – through the graphical user interface and through commands in the terminal. I will perform these actions using the console commands of OS Home Assistant.
● ● ●
Step One: System Backup.
To backup the state of the system before performing the update, use the functionality of snapshots.
We open the session of the terminal.
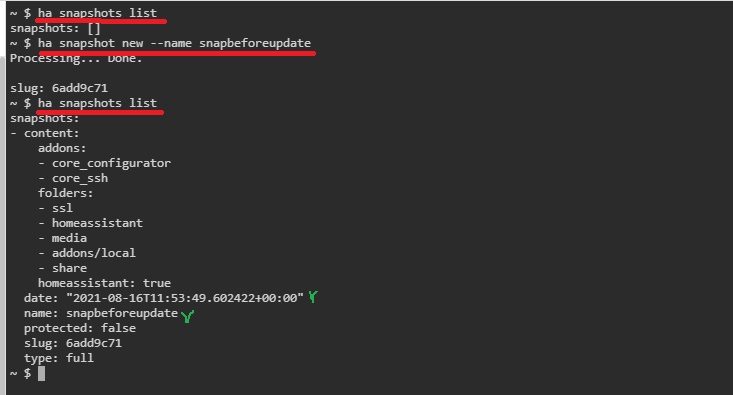
First, let’s learn about the list of existing snapshots:
ha snapshot listLet’s create a new snapshot:
ha snapshot new --name snapbeforeupdateAgain, ask for a list of snapshots to see its properties:
● ● ●
Step Two: Check the configuration.
For a successful update, it is recommended to check the configuration of the Home Assistant OS:
ha core check
● ● ●
Step Three: Update the Home Assistant OS.
First we learn about the version number of our system:
ha os info
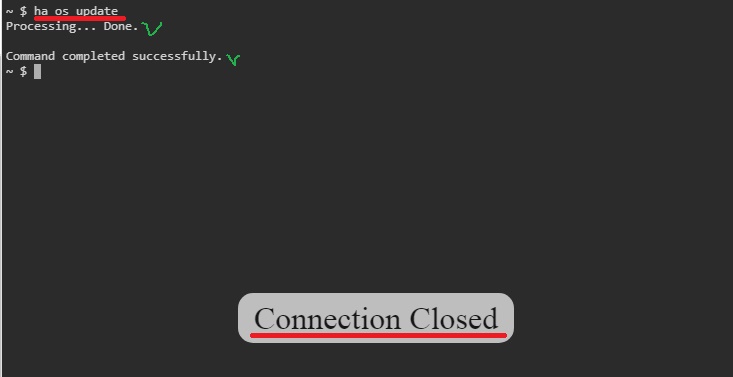
Next, perform the update:
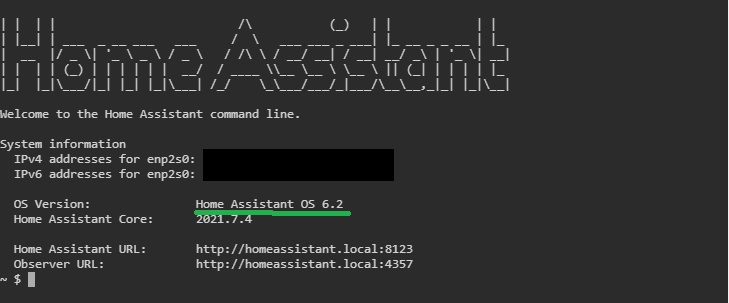
ha os updateAfter the upgrade, the system will automatically reboot. We will be informed about this by the lost connection:
After reconnecting, we will receive up-to-date information about the updated version:
● ● ●
Step Four: Update Home Assistant Core.
Similar to the previous step, we first learn about the number of our version:
ha core info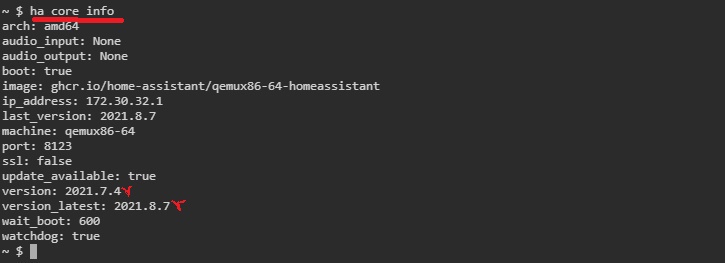
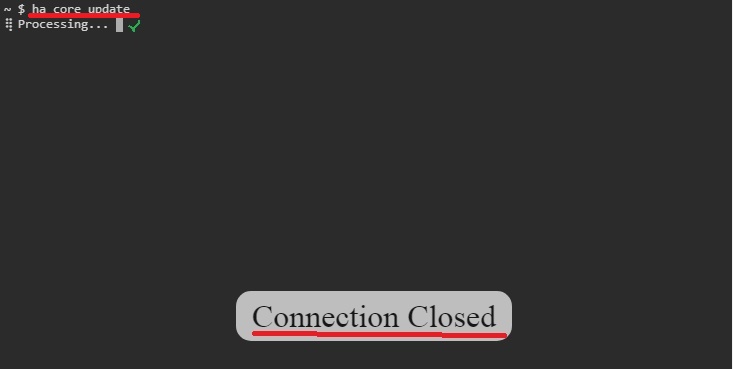
Next, perform the update:
ha core updateSimilarly, after the upgrade, the system will reboot. The connection will be lost for a while. Also, after rebooting, we will be forced to go through the login process again.
After rebooting, run the command again:
ha core info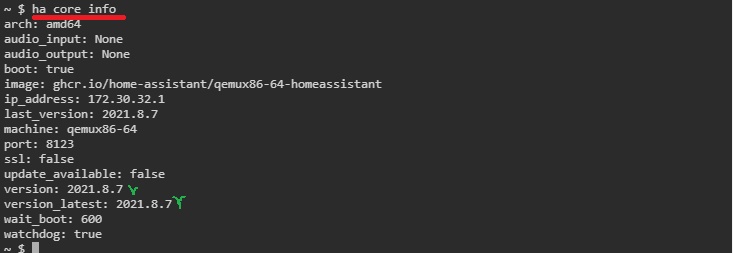
Congratulations! This completes the update to the current version!
What’s next?
So at this point in time we already have the ability to work with configuration files, monitor the work of Home Assistant using commands in the terminal and we have updated the system to the latest version.
At this stage we will pause, and in the next publication we will tell about:
- Sensors for monitoring system parameters: Raspberry Pi Power Quality and Processor Temperature Control Sensors; Processor, Memory, Disk, Network Monitoring Sensors;
- Home Assistant Database Size monitoring;
- Integration: Internet connection monitoring;
- Add-On and Integration with external devices: Uninterruptible power supply monitoring.
But about this in the next post!
See you,
Sincerely, AIRRA!