
The Next Step
Hello everyone who reads the series of publications “My Smart Home. From the beginning, step by step to…”. In the previous story, I described the necessary equipment to start implementation.
Now that all the components have arrived and are available, let’s move on to the software part. So we need any computer with Windows (x86 / x64), macOS, Linux x64 (64-bit) / x86 (32-bit), with the ability to work with an SD Card adapter and Internet access.
Let’s get started!
List of Software
The list for downloading software components is as follows:
Importantly! Other versions balenaEtcher and Home Assistant image will be required for other hardware platforms.
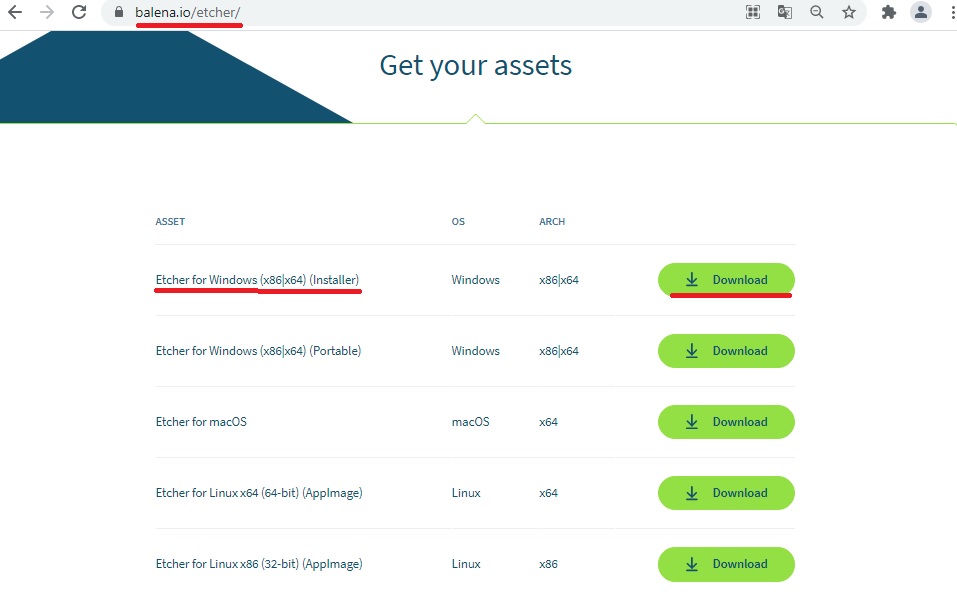
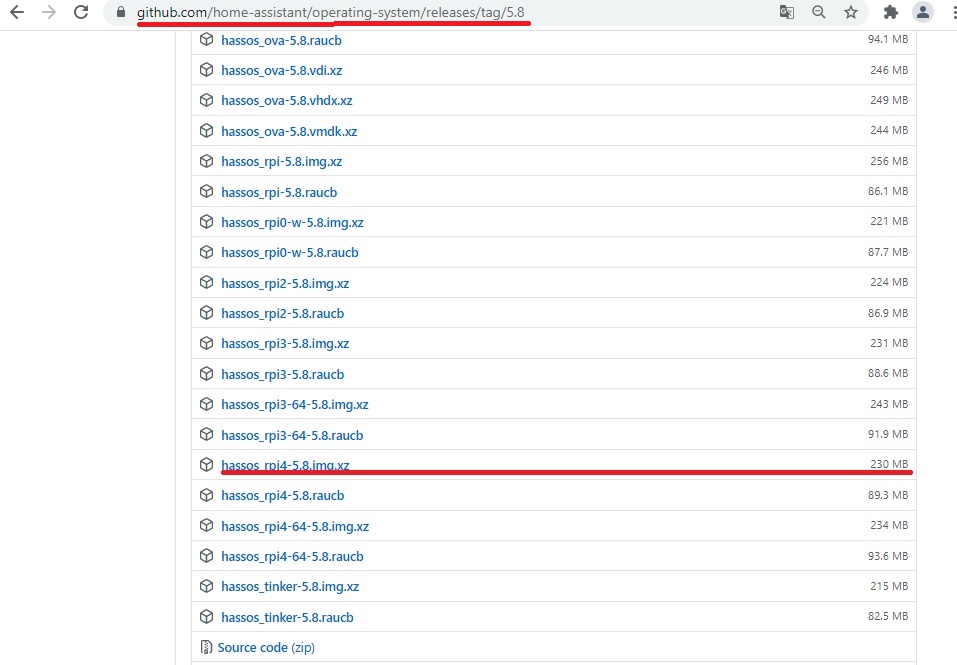
Image burning
When all the software is available, you can start writing the image to the SD card. Three small steps.
The procedure is as follows:
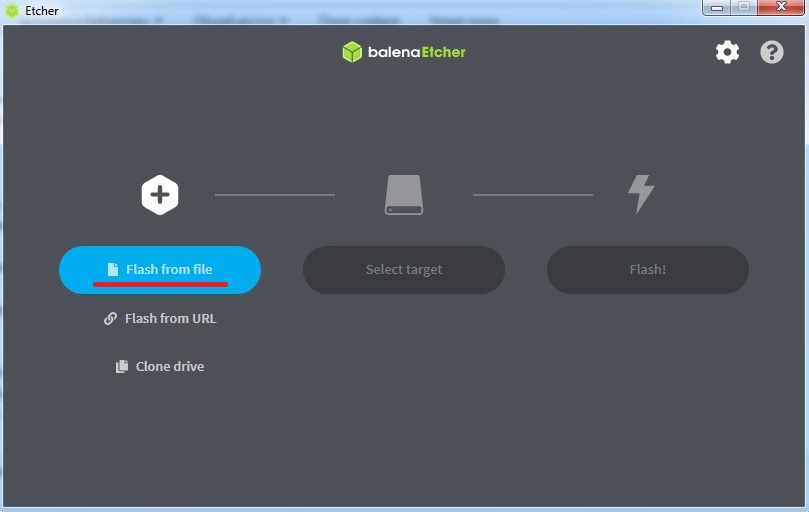
- Run balenaEtcher. Select the option “Flash from file”:
- Choose the SD card that we will use to run the Home Assistant OS on the Raspberry Pi 4 platform:
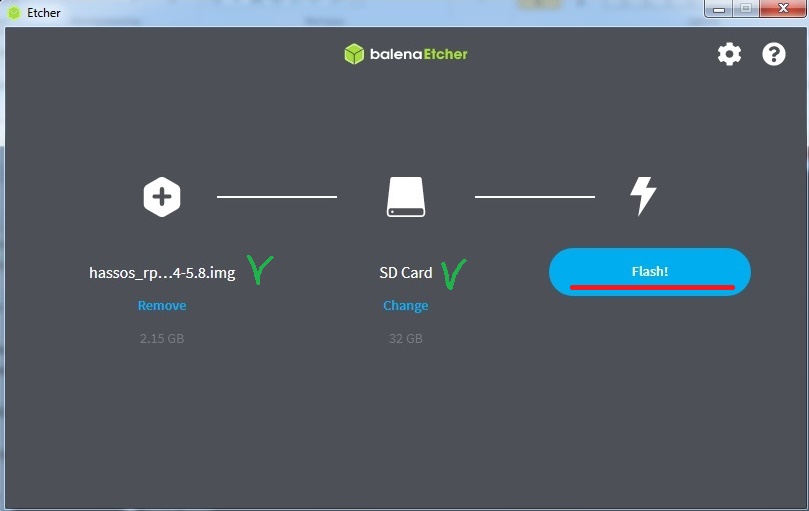
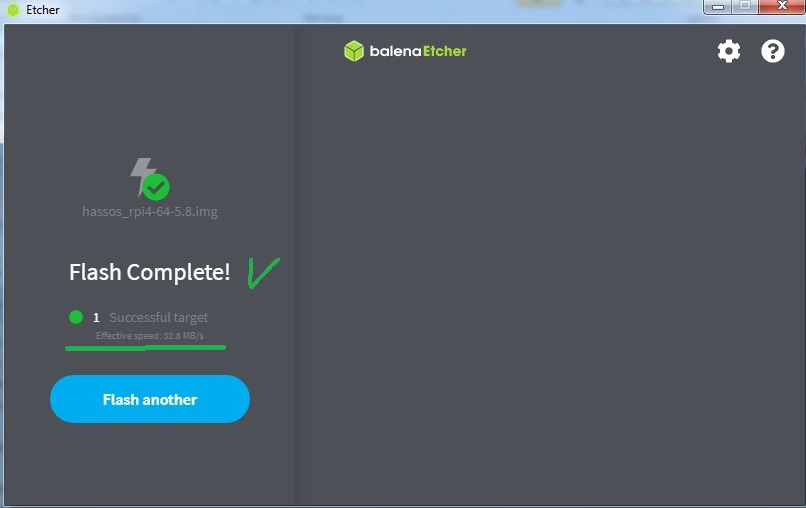
- Select “Flash!” to start recording an image. When balenaEtcher finishes recording the image and checks the result of the recording with the original, we will receive a confirmation:
Start Up Your Raspberry Pi
So the SD card with the image of Home Assistant is ready! The following sequence of steps is as follows:
- Insert the newly created installation media (SD card) into the Raspberry Pi 4 slot;
- Connect the Ethernet cable to the network;
- Connect the power supply;
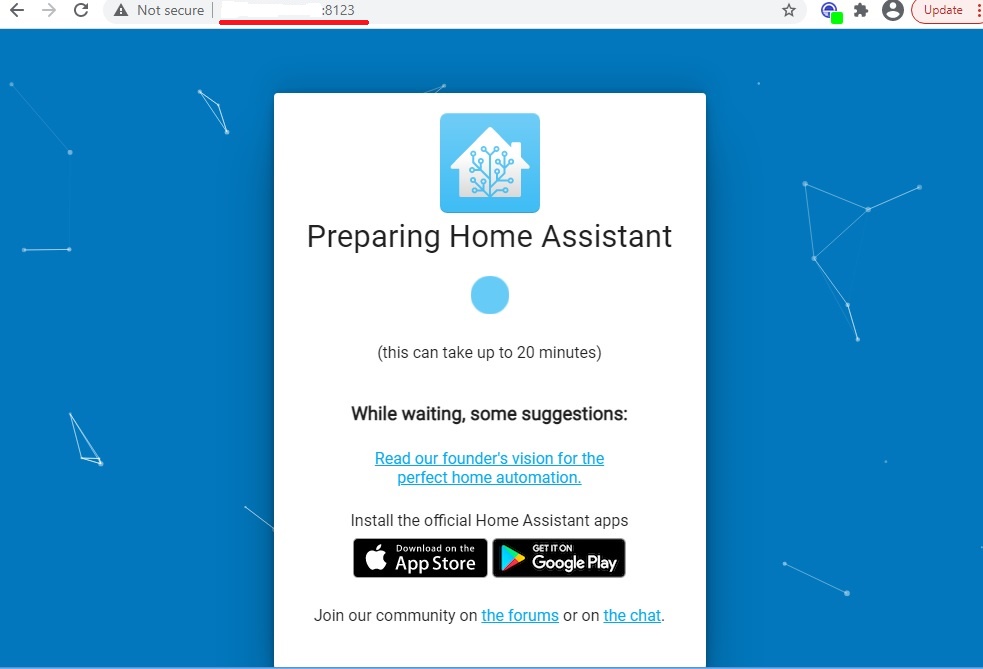
- In a few minutes we will be able to access the Home Assistant page at http: //X.X.X.X: 8123, where X.X.X.X is the address that Raspberry Pi received from the DHCP server:
The first settings
So, Home Assistant OS is installed, it’s time to start setting it up.
At this stage, the web interface Home Assistant itself will offer to configure the basic parameters.
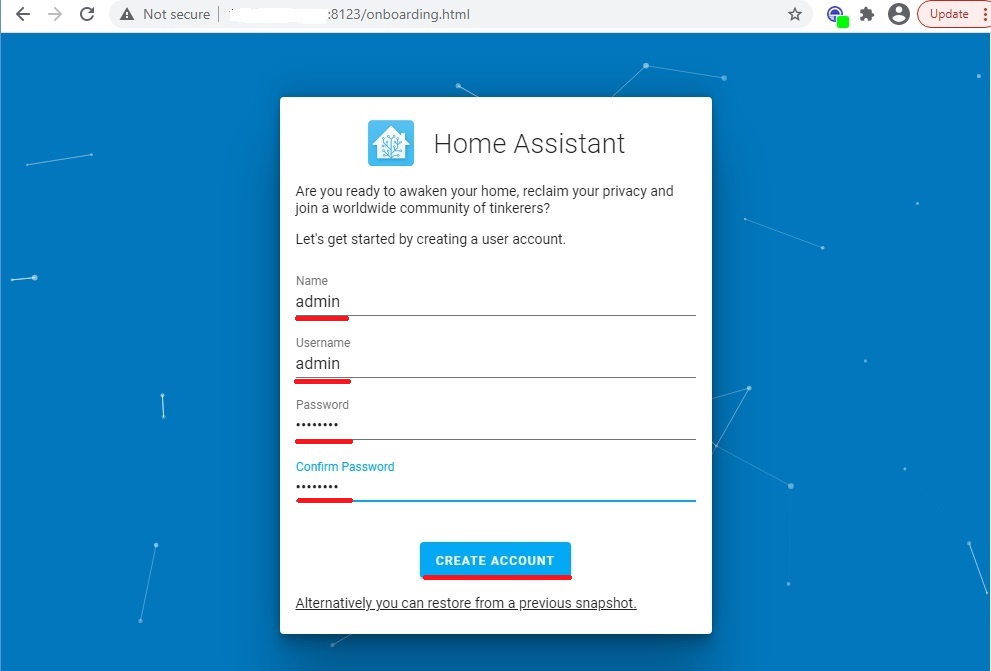
- Create a Home Assistant owner account. This account will be an administrator and will always be able to change any settings. Enter the name, username, password:
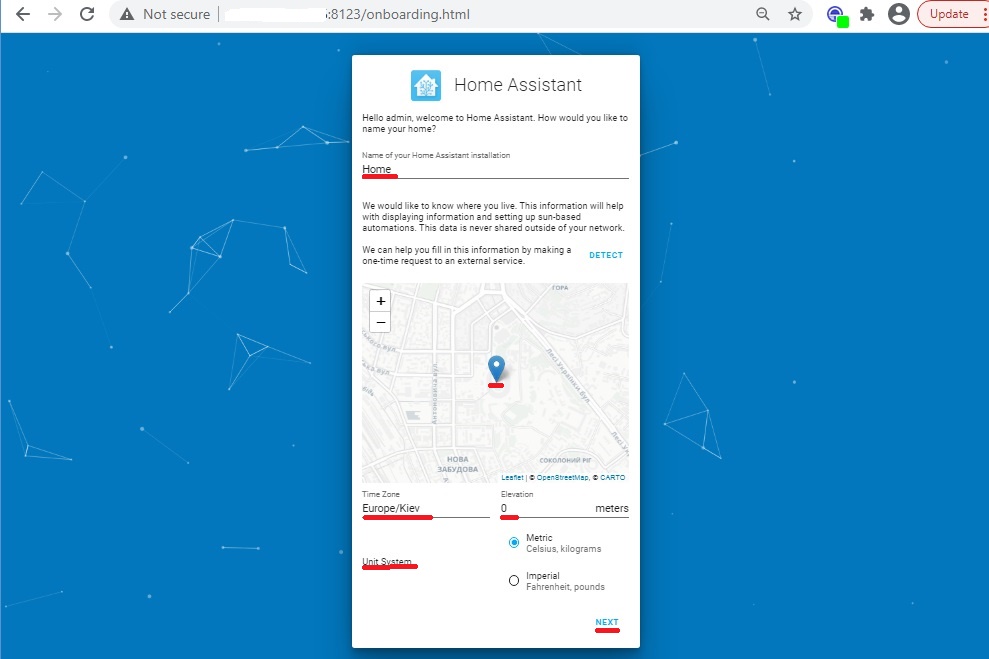
- Specify the name and location parameters of the house, time zone:
- If you want to share information with developers about the work of your copy of Home Assistant in terms of analytics, integration, statistics or diagnostic data – select the necessary items:
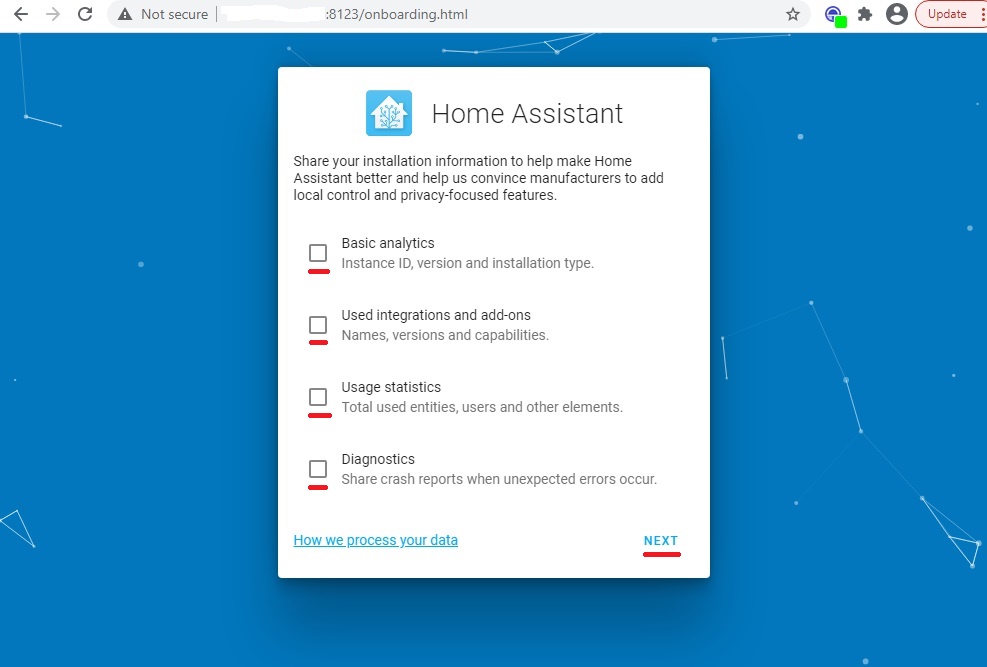
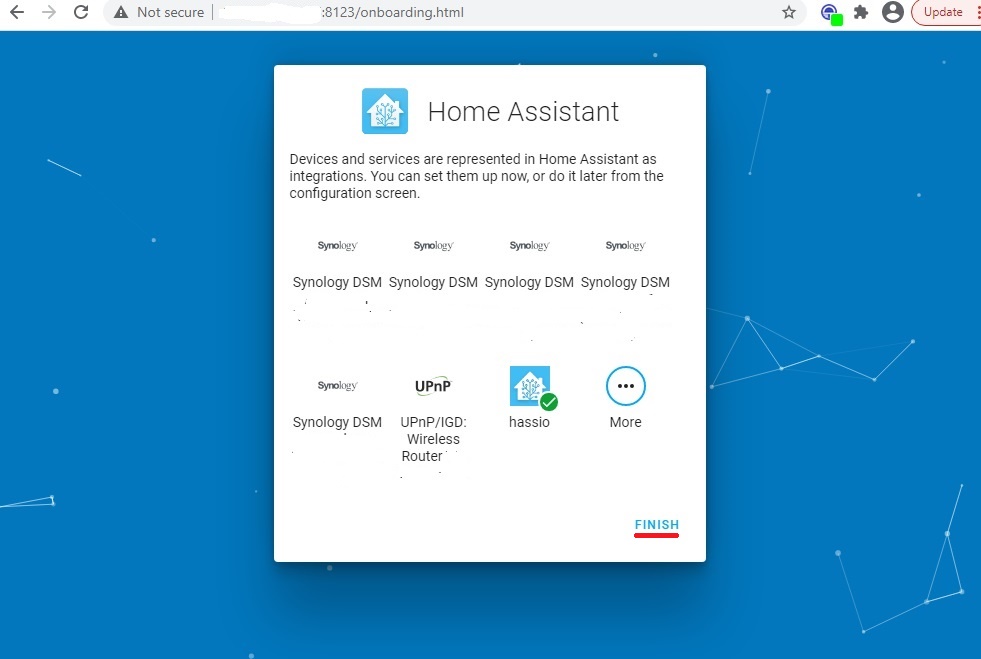
- The integration setup phase can now be postponed. We will return to this direction later:
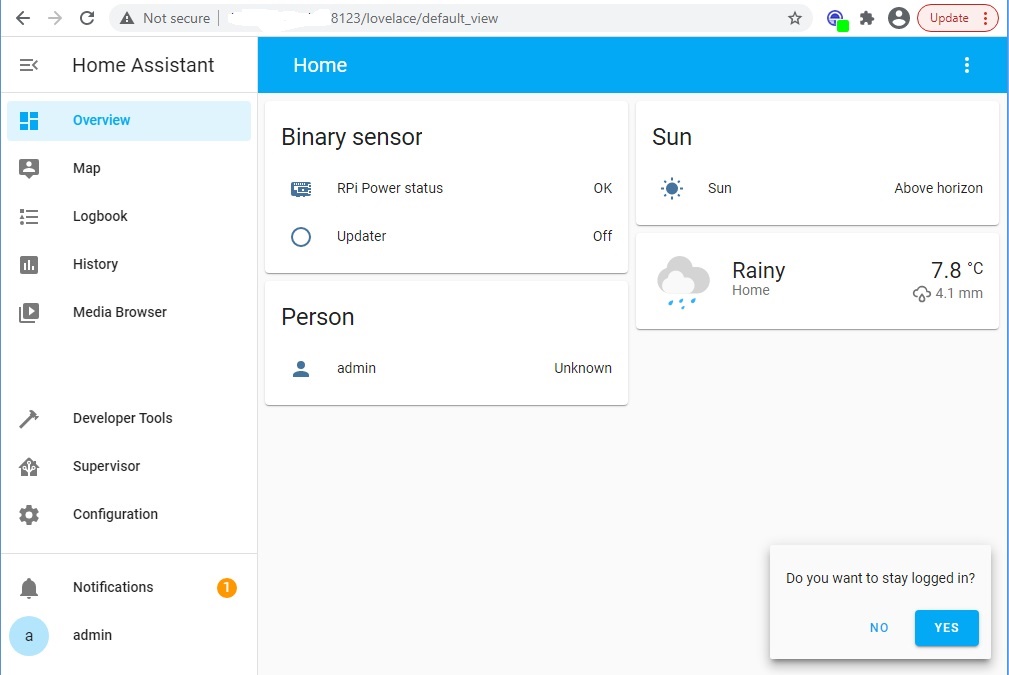
- Finish, we get the configured start web interface of Home Assistant:
Congratulations! And this important stage has been successfully completed!
Testing environment
We will need a test site to test the changes that will be made in the productive environment of Home Assistant. It is not necessary to allocate separate equipment for this task, so we will use the virtualization platform for this purpose.
As a cloud architect, I have my own test demo environment. It works on the basis of VMware vSphere 5.x and 6.x. Home Assistant OS can be successfully run in this virtualization platform, although with some features.
Since we will do such actions periodically, I decided to write a small script in Powershell (PowerCli). It is designed to automate the process of creating a test environment Home Assistant in the form of a virtual machine VMware vSphere 5.x, 6.x.
The script consists of 15 steps:
- Define variables;
- Download HASS OS vmdk.xz;
- Extract HASS OS vmdk, rename from .tar, delete .xz;
- Connect to VMware Infrastucture;
- Set Datastore properties;
- Create HASS OS Virtual Machine;
- Copy HASS OS vmdk to Virtual Machine Datastore Folder;
- Create Configuration Specification HASS OS Virtual Machine;
- Check if there is an IDE COntroller present;
- Add IDE harddisk to VM configuration;
- Set VM EFI firmware;
- Reconfigure HASS OS Virtual Machine;
- Start HASS OS Virtual Machine;
- Get Ip Address HASS OS Virtual Machine;
- Open Web Browser and go to Home Assistant Start Web page.
The script code is below:
<#
.SYNOPSIS
    Automate create Home Assistant test Virtual Machine in VMware vSphere.
.DESCRIPTION
    This script is designed to automate the process of creating
    a test environment Home Assistant in the VMware virtual machine.
.NOTES
    File Name      : HassVmwareTestEnv.ps1
    Author         : AIRRA (roman@airra.net)
    Prerequisite   : PowerShell V2 over Vista and upper,
                     7zip4powershell module,
                     VMware.VimAutomation.Core snap-in.

    Copyright 2021 - AIRRA
.LINK
    Script posted over:
    http://blogs.airra.net
#>

# Step 1: Define variables
$HassVMDKUrl = "https://github.com/home-assistant/operating-system/releases/download/5.8/hassos_ova-5.8.vmdk.xz" # Home Assitant git download Release Path
$HassVMDKDownloadPath = $env:TEMP # Path to download Folder
$HassVMDKArchiveName = "hassos_ova-5.8" # Home Assitant VMDK Archive Name

$VIServer = "_" # Address of VMware Vcenter Server
$VIServerUser = "_" # User with admin permissions
$VIServerUserPassword = "_" # Password

$VIHost = "_" # Address of of VMware Esxi
$VIDatastoreName = "_" # Datasore Name
$VINetwork = "_" # Network Name
$HassVMName = "hassio.test" # Virtual Machine Name

$HassVMDKSourcePath = $env:TEMP
$HassVMDKSourceFile = "hassos.vmdk"
$HassVMDK = $HassVMDKSourcePath + "\" + $HassVMDKSourceFile
$PathDisk = "[" + $VIDatastoreName + "] " + $HassVMName + "/" + $HassVMDKSourceFile

# Step 2: Download HASS OS vmdk.xz.
[Net.ServicePointManager]::SecurityProtocol = [Net.SecurityProtocolType]::Tls12
Invoke-WebRequest -Uri $HassVMDKUrl -OutFile ($HassVMDKDownloadPath + "/" + $HassVMDKArchiveName + ".vmdk.xz")

# Step 3: Extract HASS OS vmdk, rename from .tar, delete .xz.
Expand-7Zip -ArchiveFileName ($HassVMDKDownloadPath + "/" + $HassVMDKArchiveName + ".vmdk.xz") -TargetPath $HassVMDKDownloadPath
Remove-Item -Path ($HassVMDKDownloadPath + "/" + $HassVMDKArchiveName + ".vmdk.xz")
Get-Item -Path ($HassVMDKDownloadPath + "/" + $HassVMDKArchiveName + ".vmdk.tar") | Rename-Item -NewName $HassVMDKSourceFile

# Step 4: Connect to VMware Infrastucture.
[System.Net.ServicePointManager]::SecurityProtocol = [System.Net.SecurityProtocolType]::Tls,[System.Net.SecurityProtocolType]::Tls11,[System.Net.SecurityProtocolType]::Tls12
Connect-VIServer -Server $VIServer -User $VIServerUser -Password $VIServerUserPassword

# Step 5: Set Datastore properties.
$Datastore = Get-Datastore $VIDatastoreName
New-PSDrive -Location $Datastore -Name vids -PSProvider VimDatastore -Root ""
Set-Location vids:

# Step 6: Create HASS OS Virtual Machine.
New-VM -Name $HassVMName -VMHost $VIHost -Datastore $VIDatastoreName -MemoryMB 1024 -NumCPU 1 -DiskMB 1 -NetworkName $VINetwork -GuestID debian6_64Guest
Get-HardDisk -VM $HassVMName -Name 'Hard disk 1' | Remove-HardDisk -Confirm:$false -DeletePermanently:$true

# Step 7: Copy HASS OS vmdk to Virtual Machine Datastore Folder.
Copy-DatastoreItem -Item $HassVMDK -Destination vids:$HassVMName

# Step 8: Create Configuration Specification HASS OS Virtual Machine.
$vm = Get-VM -Name $HassVMName
$spec = New-Object VMware.Vim.VirtualMachineConfigSpec

# Step 9: Check if there is an IDE COntroller present.
$ideCtrl = $vm.ExtensionData.Config.Hardware.Device | where {$_.GetType().Name -eq "VirtualIDEController"} | select -First 1
if(!$ideCtrl){
    $ctrl = New-Object VMware.Vim.VirtualDeviceConfigSpec
    $ctrl.Operation = "add"
    $ctrl.Device = New-Object VMware.Vim.VirtualIDEController
    $ideKey = -1
    $ctrl.Device.ControllerKey = $ideKey
    $spec.deviceChange += $ctrl
}
else{
    $ideKey = $ideCtrl.Key
}

# Step 10: Add IDE harddisk to VM configuration.
$dev = New-Object VMware.Vim.VirtualDeviceConfigSpec
$dev.Operation = "add"
$dev.Device = New-Object VMware.Vim.VirtualDisk
$dev.Device.backing = New-Object VMware.Vim.VirtualDiskFlatVer2BackingInfo
$dev.Device.backing.DiskMode = "persistent"
$dev.Device.Backing.FileName = $PathDisk
$dev.Device.ControllerKey = $ideKey
$dev.Device.UnitNumber = -1
$spec.deviceChange += $dev

# Step 11: Set VM EFI firmware.
$spec.Firmware = [VMware.Vim.GuestOsDescriptorFirmwareType]::efi

# Step 12: Reconfigure HASS OS Virtual Machine.
$vm.ExtensionData.ReconfigVM($spec)

# Step 13: Start HASS OS Virtual Machine.
Start-VM -VM $HassVMName

# Step 14: Get Ip Address HASS OS Virtual Machine.
$Ip = (Get-VM -Name $HassVMName).Guest.IpAddress | ?{$_ -notmatch ':'}
Do {
    Start-Sleep -s 10
    }
While ($Ip -eq "" -or $Ip -eq $null)

# Step 15: Open Web Browser and go to Home Assistant Start Web page.
Invoke-Expression "cmd.exe /C start http://$Ip[1]:8123"
Important: The script uses the following components:
- 7zip4powershell module,
- VMware.VimAutomation.Core snap-in.
What’s next?
So, at this point we have a deployed and initially set up Home Assistant.
At this stage we will pause, and in the future we will talk about:
- Software add-on: Text config editor, Terminal;
- Configuration file: configuration.yaml;
- Upgrading Home Assistant components to the latest version.
But about this in the next post!
See you,
Sincerely, AIRRA!


