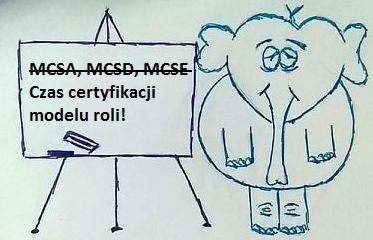
Certyfikaty MCSA, MCSD, MCSE należą już do przeszłości! Czas certyfikacji modelu roli!

(c) 2020, AIRRA

Microsoft koncentruje się na szkoleniach i certyfikacjach opartych na rolach, które mogą pomóc Ci rozwinąć niezbędne umiejętności i doświadczenie, aby rozwijać się w przyspieszonym i coraz bardziej konkurencyjnym świecie opartym na chmurze. Szkolenia i certyfikaty oparte na rolach oparte są na nowych funkcjach i usługach, które Microsoft stale dodaje do rozwiązań chmurowych, minimalizując braki umiejętności związane z odpowiednimi rolami w pracy.

Odkąd Microsoft ogłosił, że koncentruje się na szkoleniach opartych na rolach i certyfikacji we wrześniu 2018 r., Dodał 34 statusy do swojego portfolio w Azure, Modern Workplace and Business Applications. Microsoft nadal rozszerza swoją ofertę programów nauczania opartych na rolach, wraz ze wszystkimi innymi egzaminami o statusie Microsoft Certified Solutions Associated (MCSA), Microsoft Certified Solutions Developer (MCSD), Microsoft Certified Solutions Expert (MCSE), które odbywają się po 30 czerwca 2020.

Jeśli pracujesz nad certyfikacją MCSA, MCSD lub MCSE, musisz zdać wszystkie niezbędne egzaminy przed ich wygaśnięciem.
Jeśli masz certyfikaty MCSA, MCSD i MCSE, pozostaną one w Twojej transkrypcji Microsoft nawet po egzaminach. Statusy te pozostaną w aktywnej sekcji przez dwa lata od 30 czerwca 2020 r .; Certyfikacja zostanie następnie przeniesiona do sekcji „nieaktywne statusy”.

Certyfikaty z egzaminami wygasają 30 czerwca 2020 r.:

  • MCSA: BI Reporting
  • MCSA: Dynamics 365 for Operations
  • MCSA: SQL 2016 BI Development
  • MCSA: SQL 2016 Database Admin
  • MCSA: SQL 2016 Database Dev
  • MCSA: SQL Server 2012/2014
  • MCSA: Universal Windows Platform
  • MCSA: Web Applications
  • MCSA: Windows Server 2012
  • MCSA: Windows Server 2016
  • MCSD: App Builder
  • MCSE: Business Applications
  • MCSE: Core Infrastructure
  • MCSE: Data Management & Analytics
  • MCSE: Productivity

Egzaminy, które wygasają 30 czerwca 2020 r.:
Egzaminy te zostaną zawieszone do 23:59 CET 30 czerwca 2020 r.

  • 70-333: Deploying Enterprise Voice with Skype for Business 2015
  • 70-334: Core Solutions for Microsoft Skype for Business 2015
  • 70-339: Managing Microsoft SharePoint Server 2016
  • 70-345: Designing and Deploying Microsoft Exchange Server 2016
  • 70-457: Developing Mobile Apps
  • 70-410: Installing and Configuring Windows Server 2012
  • 70-411: Administering Windows Server 2012
  • 70-412: Configuring Advanced Windows Server 2012 Services
  • 70-413: Designing and Implementing a Server Infrastructure
  • 70-414: Implementing an Advanced Server Infrastructure
  • 70-417: Upgrading Your Skills to MCSA Windows Server 2012
  • 70-461: Querying Microsoft SQL Server 2012/2014
  • 70-462: Administering Microsoft SQL Server 2012/2014 Databases
  • 70-463: Implementing a Data Warehouse with Microsoft SQL Server 2012/2014
  • 70-464: Developing Microsoft SQL Server 2012/2014 Databases
  • 70-465: Designing Database Solutions for Microsoft SQL Server
  • 70-466: Implementing Data Models and Reports with Microsoft SQL Server
  • 70-467: Designing Business Intelligence Solutions with Microsoft SQL Server
  • 70-480: Programming in HTML5 with JavaScript and CSS3
  • 70-483: Programming in C#
  • 70-486: Developing ASP.NET MVC Web Applications
  • 70-487: Developing Microsoft Azure and Web Services
  • 70-537: Configuring and Operating a Hybrid Cloud with Microsoft Azure Stack
  • 70-705: Designing and Providing Microsoft Licensing Solutions to Large Organizations
  • 70-740: Installation, Storage, and Compute with Windows Server 2016
  • 70-741: Networking with Windows Server 2016
  • 70-742: Identity with Windows Server 2016
  • 70-743: Upgrading Your skills to MCSA: Windows Server 2016
  • 70-744: Securing Windows Server 2016
  • 70-745: Implementing a Software-Defined Datacenter
  • 70-761: Querying Data with Transact-SQL
  • 70-762: Developing SQL Databases
  • 70-764: Administering a SQL Database Infrastructure
  • 70-765: Provisioning SQL Databases
  • 70-767: Implementing a Data Warehouse using SQL
  • 70-768: Developing SQL Data Models
  • 70-777: Implementing Microsoft Azure Cosmos DB Solutions
  • 70-778: Analyzing and Visualizing Data with Microsoft Power BI
  • 70-779: Analyzing and Visualizing Data with Microsoft Excel
  • MB2-716: Microsoft Dynamics 365 Customization and Configuration
  • MB6-894: Development, Extensions and Deployment for Microsoft Dynamics 365 Finance
  • MB6-897: Microsoft Dynamics 365 for Retail
  • MB6-898: Microsoft Dynamics 365 Human Resources
Zaszufladkowano do kategorii Certyfikacja, Microsoft, Szkolenie | Dodaj komentarz

Zaczynam!

Witam wszystkich!

W powietrzu Andrey Romanenko. Jestem architektem i instruktorem IT. Moją główną specjalizacją i sfera zainteresowań zawodowych jest wirtualizacja, technologie chmurowe, infrastruktura jako kod i wszystko, co ma związek z tym tematem.

Ten blog jest próbą usystematyzowania, podsumowania i digitalizacji wszystkiego, co zgromadziło się w formie papierowych dzienników, notatek elektronicznych, dokumentów i tylko nagłych myśli, które pojawiły się w ciągu ostatnich 20 lat. Niektóre notatki będą datowane tak, jak zostały napisane.

Byłbym zadowolony, gdyby każdy odwiedzający znalazł tu coś pożytecznego.

Z poważaniem Andrew.

P.S. Lista szkoleń, które mogę wziąć, znajduje się na stronie Szkolenie. Informacje kontaktowe są dostępne na stronie O mnie.

Zaszufladkowano do kategorii Ogólne | Dodaj komentarz

Microsoft System Center Virtual Machine Manager 2007 – Podstawa zwirtualizowanego centrum danych. Część 2. Architektura.

Zaszufladkowano do kategorii Microsoft, Retrospektywa, Technologia, Wirtualizacja | Dodaj komentarz

Architektura i projektowanie. Kod i programowanie. Część 3. Wstęp. Funkcje PowerShell. PSVisio.ps1. MsSCVMM2k7ArchDiagramV1.ps1. Krótkie podsumowanie.


Wstęp


Witam wszystkich czytelników bloga poświęconego architekturze IT i szkoleniom.

Kontynuujemy publikację artykułów pod wspólnym tytułem „Architektura i projektowanie. Wdrożenie i eksploatacja. Kod i programowanie”.

W poprzednim materiale omawialiśmy sposób przedstawienia schematu architektury systemu Microsoft System Center Virtual Machine Manager 2007 w formacie Visio w ramach dedykowanego cyklu artykułów. Do realizacji tego zadania wykorzystaliśmy kod PowerShell. Rezultat w pełni spełnił nasze oczekiwania. Jednak istotnym minusem okazała się duża objętość kodu oraz brak strategii jego ponownego użycia. Dzięki funkcjom możemy uporządkować bloki kodu tak, aby móc je wielokrotnie wykorzystywać i jednocześnie zmniejszyć jego ogólną objętość.

Temu właśnie będzie poświęcony ten wpis.

Funkcje PowerShell


Aby korzystać z funkcji PowerShell, konieczne jest umieszczenie kodu w pliku oraz zastosowanie odpowiedniej składni poleceń i inicjalizacji tych elementów. Dlatego utworzymy nowy plik PSVisio.ps1, w którym zgromadzimy wszystkie nasze rozwiązania.

Aby zainicjalizować kod napisanych przez nas funkcji PowerShell, należy wykonać następujące polecenie:

. .\PSVisio.ps1

W przypadku wprowadzenia zmian w kodzie, zmodyfikowaną funkcję należy ponownie załadować poleceniem:

rm Function:\NameOfFunction

A następnie ponownie należy wykonać inicjalizację poleceniem opisanym powyżej.

Na początku tworzenia naszego kodu i uzupełniania go funkcjami plik PSVisio.ps1 będzie zawierał nagłówek w formie komentarzy oraz początkową inicjalizację kilku zmiennych. Zostaną one wykorzystane do tworzenia nazw obiektów poprzez ich kolejne numerowanie:

#######################################################################
#
# Powershell functions for operate Visio Drawing
#  
# Version:        0.1
# Author:         Andrii Romanenko
# Website:        blogs.airra.net
# Creation Date:  14.09.2007
# Purpose/Change: Initial script development.
# Create function New-VisioApplication.
#
# Run:
#   
# . .\PSVisio.ps1
#
#######################################################################

# Set Variables
$Shape=0
$Line=0
$Icon=0
$Text=0
$PolyLine=0

New-VisioApplication 

Przypomnijmy sobie początkowy fragment kodu, który opisaliśmy w poprzednim wpisie:

# Step 1.
# Create Visio Object
# Create Document from Blank Template
# Set Active Page
$Application = New-Object -ComObject Visio.Application
$Application.Visible = $True
$Documents = $Application.Documents
$Document=$Application.Documents.Add('')
$Page=$Application.ActivePage
$Application.ActivePage.PageSheet

# Step 2.
# Add Basic Visio Stensils
# Set Masters Item Rectangle
$Stensil1 = $Application.Documents.Add("BASIC_M.vss")
$Rectangle = $Stensil1.Masters.Item("Rectangle")

Jak widać, zaczyna się on od poleceń tworzących obiekt aplikacji Visio. Uporządkujmy te proste kroki w postaci pierwszej funkcji – New-VisioApplication.

Function New-VisioApplication {

#######################################################################
#
# Powershell function for create Visio Application
#  
# Version:        0.1
# Author:         Andrii Romanenko
# Website:        blogs.airra.net
# Creation Date:  14.09.2007
# Purpose/Change: Initial script development
#
# Run:
#   
# New-VisioApplication
#
#######################################################################

# Create Visio Object
$Script:Application = New-Object -ComObject Visio.Application
$Script:Application.Visible = $True
}

Funkcja okazała się dość prosta i nie wymaga żadnych parametrów. Nie zapominajmy o dodawaniu komentarzy wyjaśniających nasz kod.

New-VisioDocument

Opiszmy kolejną funkcję służącą do tworzenia nowego dokumentu Visio: New-VisioDocument.

Funkcja utworzy nowy dokument Visio na podstawie pustego szablonu. Funkcja ta również nie posiada żadnych parametrów wejściowych.

Function New-VisioDocument {

#######################################################################
#
# Powershell function for create Visio Document
#  
# Version:        0.1
# Author:         Andrii Romanenko
# Website:        blogs.airra.net
# Creation Date:  14.09.2007
# Purpose/Change: Initial script development
#
# Run:
#   
# New-VisioDocument
#
#######################################################################

# Create Document from Blank Template
$Script:Documents = $Script:Application.Documents
$Script:Document=$Script:Application.Documents.Add('')
}

Set-VisioPage 

Funkcja Set-VisioPage również jest prosta. Jej logika polega na ustawieniu aktywnej strony, która będzie podstawą naszej przyszłej schemy. Funkcja nie posiada parametrów wejściowych.

Function Set-VisioPage {

#######################################################################
#
# Powershell function for Set Active Visio Document Page
#  
# Version:        0.1
# Author:         Andrii Romanenko
# Website:        blogs.airra.net
# Creation Date:  14.09.2007
# Purpose/Change: Initial script development
#
# Run:
#   
# Set-VisioPage
#
#######################################################################

# Set Visio Active Page
$Script:Page=$Script:Application.ActivePage
$Script:Application.ActivePage.PageSheet
}

Add-VisioStensil

W Visio figury opierają się na szablonach (stencils). Dlatego zadaniem kolejnej funkcji Add-VisioStensil jest dodanie szablonów figur z odpowiedniego pliku .vss. Funkcja przyjmuje dwa parametry wejściowe: Name – nazwa obiektu szablonu, File – nazwa pliku szablonów.

Function Add-VisioStensil ($Name, $File) {

#######################################################################
#
# Powershell function for Add Visio Stensil
#  
# Version:        0.1
# Author:         Andrii Romanenko
# Website:        blogs.airra.net
# Creation Date:  15.09.2007
# Purpose/Change: Initial script development
#
# Run:
#   
# Add-VisioStensil -Name "Basic" -File "BASIC_M.vss"
#
#######################################################################

# Set Expression and Add Visio Stensil
$Expression = '$Script:' + $Name + ' = $Script:Application.Documents.Add("' + $File +'")'
Invoke-Expression $Expression
}

Set-VisioStensilMasterItem

Aby pracować z konkretną figurą, należy określić, który element będzie głównym wzorcem figury. Logikę tej operacji zaimplementujemy w postaci funkcji Set-VisioStensilMasterItem. Funkcja posiada dwa parametry wejściowe: Stensil – nazwa obiektu szablonu, Item – nazwa figury.

Function Set-VisioStensilMasterItem ($Stensil, $Item) {

#######################################################################
#
# Powershell function for Set Stensil Master Item
#  
# Version:        0.1
# Author:         Andrii Romanenko
# Website:        blogs.airra.net
# Creation Date:  15.09.2007
# Purpose/Change: Initial script development
#
# Version:        0.2
# Author:         Andrii Romanenko
# Website:        blogs.airra.net
# Creation Date:  17.09.2007
# Purpose/Change: Reorganize Variables
#
# Run:
#   
# Set-VisioStensilMasterItem -Stensil "Basic" -Item "Rectangle"
#
#######################################################################

# Set Expression And Set Masters Item Rectangle
$ItemWithoutSpace = $Item -replace " ",""
$Expression = '$Script:' + $ItemWithoutSpace + ' = $Script:' + $Stensil + '.Masters.Item("' + $Item + '")'
Invoke-Expression $Expression
}

Draw-VisioItem

Dotarliśmy wreszcie do funkcji, które będą wykonywać operacje tworzenia i wyświetlania obiektów o określonych właściwościach. Na początek będą to proste figury geometryczne – prostokąt, koło, linia itp.

Ponownie przypomnijmy sobie fragment kodu, który wykonuje te operacje. 

# Step 3.
# Draw Main Rectangle, Set Size, Set Colour
# Set Text, Size, Color, Align
# Draw Line, Set Weight, Color
$Shape1 = $Page.Drop($Rectangle, 6.375, 7.125)
$Shape1.Cells('Width').Formula = '12.2501'
$Shape1.Cells('Height').Formula = '7.25'
$Shape1.Cells('FillForegnd').Formula = '=RGB(0,153,204)'
$Shape1.Cells('LinePattern').Formula = 0
$Shape1.Text = "Microsoft Virtual Machine Manager Architecture"
$Shape1.Cells('VerticalAlign') = 0
$Shape1.Cells('Para.HorzAlign') = 0
$Shape1.Cells('Char.Size').Formula = '20 pt'
$Shape1.Cells('Char.Color').Formula = '=RGB(255,255,255)'
$Line1 = $Page.DrawLine(0.3125, 10.3438, 12.4948, 10.3438)
$Line1.Cells('LineWeight').Formula = '1 pt'
$Line1.Cells('LineColor').Formula = '=RGB(255,255,255)'

# Step 4.
# Draw Client Rectangle, Set Size, Set Colour
# Set Text, Align
# Draw Line
$Shape2 = $Page.Drop($Rectangle, 1.7656, 9.2344)
$Shape2.Cells('Width').Formula = '2.7813'
$Shape2.Cells('Height').Formula = '1.9688'
$Shape2.Cells('FillForegnd').Formula = '=RGB(209,235,241)'
$Shape2.Cells('LinePattern').Formula = 1
$Shape2.Text = "Client"
$Shape2.Cells('VerticalAlign') = 0
$Shape2.Cells('Char.Size').Formula = '14 pt'
$Line2 = $Page.DrawLine(0.4297, 9.9427, 3.0833, 9.9427)
$Line2.Cells('LineWeight').Formula = '0.5 pt'
$Line2.Cells('LineColor').Formula = '=RGB(0,0,0)'

# Step 5.
# Add Computer Items Visio Stensils
# Set Masters item PC
$Stensil2 = $Application.Documents.Add("COMPS_M.vss")
$PC1 = $Stensil2.Masters.Item("PC")

# Step 6.
# Draw item PC
# Set Text, Size
$Shape3 = $Page.Drop($PC1, 1.1173, 9.1693)
$Shape3.Text = "Administrator Console"
$Shape3.Cells('Char.Size').Formula = '10 pt'

# Step 7.
# Draw Powershell Icon
# Set Position, Size
# Set Text
$Picture1 = $Page.Import("c:\!\powershell.png")
$Picture1.Cells('Width').Formula = '0.9843'
$Picture1.Cells('Height').Formula = '0.9843'
$Picture1.Cells('PinX').Formula = '2.5547'
$Picture1.Cells('PinY').Formula = '9.2682'
$Picture1.Text = "Windows Powershell"
$Picture1.Cells('Char.Size').Formula = '10 pt'

Funkcja Draw-VisioItem posiada trzy obowiązkowe parametry: Master – nazwa wzorca figury, współrzędne położenia X i Y. Pozostałe parametry, takie jak: FillForegnd – kolor wypełnienia figury, LinePattern – styl linii obrysu figury, Text – tekst figury, VerticalAlign i ParaHorzAlign – parametry wyrównania tekstu w pionie i poziomie, CharSize i CharColor – rozmiar i kolor znaków tekstu, są opcjonalne.

Function Draw-VisioItem ($Master, $X, $Y, $Width, $Height, $FillForegnd, $LinePattern, $Text, $VerticalAlign, $ParaHorzAlign, $CharSize, $CharColor) {

#######################################################################
#
# Powershell function for Draw Visio Item
#  
# Version:        0.1
# Author:         Andrii Romanenko
# Website:        blogs.airra.net
# Creation Date:  15.09.2007
# Purpose/Change: Initial script development
#
# Version:        0.2
# Author:         Andrii Romanenko
# Website:        blogs.airra.net
# Creation Date:  16.09.2007
# Purpose/Change: Add Flow Control Input Parameters
#
# Version:        0.3
# Author:         Andrii Romanenko
# Website:        blogs.airra.net
# Creation Date:  17.09.2007
# Purpose/Change: Reorganize Variables
#
# Run:
#   
# Draw-VisioItem -Master "Rectangle" -X 6.375 -Y 7.125 -Width 12.2501 -Height 7.25 -FillForegnd "RGB(0,153,204)"`
# -LinePattern 0 -Text "Microsoft Virtual Machine Manager Architecture" -VerticalAlign 0 -ParaHorzAlign 0`
# -CharSize "20 pt" -CharColor "RGB(255,255,255)"
#
#######################################################################

$Script:Shape++
$Master = $Master -replace " ",""

# Set Expression And Draw Item
$Expression = '$Script:Shape' + $Script:Shape + ' = $Script:Page.Drop(' + '$' + $Master + ',' + $X + ',' + $Y + ')'
Invoke-Expression $Expression

# Set Item Width Properties
If ($Width)
	{
		$Expression = '$Script:Shape' + $Script:Shape + '.Cells("Width").Formula = ' + $Width
		Invoke-Expression $Expression
	}

# Set Item Height Properties
If ($Height)
	{
		$Expression = '$Script:Shape' + $Script:Shape + '.Cells("Height").Formula = ' + $Height
		Invoke-Expression $Expression
	}

# Set Item FillForegnd Properties
If ($FillForegnd)
	{
		$Expression = '$Script:Shape' + $Script:Shape + '.Cells("FillForegnd").Formula = "=' +  $FillForegnd + '"'
		Invoke-Expression $Expression
	}

# Set Item LinePattern Properties
If ($LinePattern)
	{
		$Expression = '$Script:Shape' + $Script:Shape + '.Cells("LinePattern").Formula = ' + $LinePattern
		Invoke-Expression $Expression
	}

# Set Item Text
If ($Text)
	{
		$Expression = '$Script:Shape' + $Script:Shape + '.Text = "' + $Text + '"'
		Invoke-Expression $Expression
	}

# Set Item VerticalAlign Properties
If ($VerticalAlign)
	{
		$Expression = '$Script:Shape' + $Script:Shape + '.Cells("VerticalAlign").Formula = ' + $VerticalAlign
		Invoke-Expression $Expression
	}

# Set Item HorzAlign Properties
If ($ParaHorzAlign)
	{
		$Expression = '$Script:Shape' + $Script:Shape + '.Cells("Para.HorzAlign").Formula = ' + $ParaHorzAlign
		Invoke-Expression $Expression
	}

# Set Item Char.Size Properties
If ($CharSize)
	{
		$Expression = '$Script:Shape' + $Script:Shape + '.Cells("Char.Size").Formula = "' + $CharSize + '"'
		Invoke-Expression $Expression
	}

# Set Item Char.Color Properties
If ($CharColor)
	{
		$Expression = '$Script:Shape' + $Script:Shape + '.Cells("Char.Color").Formula = "=' +  $CharColor + '"'
		Invoke-Expression $Expression
	}
}

Draw-VisioLine

Funkcja Draw-VisioLine została opracowana do rysowania różnych linii. Posiada kilka obowiązkowych parametrów: współrzędne początku BeginX, BeginY oraz końca EndX, EndY. Dodatkowo można określić parametry opcjonalne: LineColor – kolor linii, BeginArrow, EndArrow – styl strzałek na początku i końcu linii.

Function Draw-VisioLine ($BeginX, $BeginY, $EndX, $EndY, $LineWeight, $LineColor, $BeginArrow, $EndArrow) {

#######################################################################
#
# Powershell function for Draw Visio Line
#  
# Version:        0.1
# Author:         Andrii Romanenko
# Website:        blogs.airra.net
# Creation Date:  15.09.2007
# Purpose/Change: Initial script development
#
# Version:        0.2
# Author:         Andrii Romanenko
# Website:        blogs.airra.net
# Creation Date:  17.09.2007
# Purpose/Change: Add Flow Control Input Parameters
#
# Run:
#   
# Draw-VisioLine -BeginX 0.3125 -BeginY 10.3438 -EndX 12.4948 -EndY 10.3438 -LineWeight "1 pt"`
# -LineColor "RGB(255,255,255)" -BeginArrow 4 -EndArrow 4
#
#######################################################################

$Script:Line++

# Set Expression And Draw Line
$Expression = '$Script:Line' + $Script:Line + ' = $Script:Page.DrawLine(' + $BeginX + ',' + $BeginY + ',' + $EndX + ',' + $EndY + ')'
Invoke-Expression $Expression

# Set Line Width Properties
If ($LineWeight)
	{
		$Expression = '$Script:Line' + $Script:Line + '.Cells("LineWeight").Formula = "' + $LineWeight + '"'
		Invoke-Expression $Expression
	}

# Set Line Color Properties
$Expression = '$Script:Line' + $Script:Line + '.Cells("LineColor").Formula = "=' +  $LineColor + '"'
Invoke-Expression $Expression

# Set Line Begin Arrow Properties
If ($BeginArrow)
	{
		$Expression = '$Script:Line' + $Script:Line + '.Cells("BeginArrow").Formula = ' + $BeginArrow
		Invoke-Expression $Expression
	}

# Set Line End Arrow Properties
If ($EndArrow)
	{
		$Expression = '$Script:Line' + $Script:Line + '.Cells("EndArrow").Formula = ' + $EndArrow
		Invoke-Expression $Expression
	}
}

Draw-VisioIcon

Funkcja Draw-VisioIcon umożliwia dodawanie do schematów wcześniej przygotowanych ikon w formacie .png lub .jpeg. Posiada kilka obowiązkowych parametrów: IconPath – ścieżka i nazwa pliku ikony, wymiary Width, Height, współrzędne PinX, PinY. Parametry opcjonalne to: Text – tekst etykiety, CharSize – rozmiar znaków tekstu.

Function Draw-VisioIcon ($IconPath, $Width, $Height, $PinX, $PinY, $Text, $CharSize) {

#######################################################################
#
# Powershell function for Draw Visio Icon
#  
# Version:        0.1
# Author:         Andrii Romanenko
# Website:        blogs.airra.net
# Creation Date:  16.09.2007
# Purpose/Change: Initial script development
#
# Version:        0.2
# Author:         Andrii Romanenko
# Website:        blogs.airra.net
# Creation Date:  17.09.2007
# Purpose/Change: Add Flow Control Input Parameters
#
# Run:
#   
# Draw-VisioIcon -IconPath "c:\!\powershell.png" -Width 0.9843 -Height 0.9843 -PinX 2.5547 -PinY 9.2682`
# -Text "Windows Powershell" -CharSize "10 pt"
#
#######################################################################

$Script:Icon++

# Import Icon Item
$Expression = '$Script:Icon' + $Script:Icon + ' = $Script:Page.Import("' + $IconPath + '")'
Invoke-Expression $Expression

# Set Icon Width Properties
$Expression = '$Script:Icon' + $Script:Icon + '.Cells("Width").Formula = ' + $Width
Invoke-Expression $Expression

# Set Icon Height Properties
$Expression = '$Script:Icon' + $Script:Icon + '.Cells("Height").Formula = ' + $Height
Invoke-Expression $Expression

# Set Icon PinX Properties
$Expression = '$Script:Icon' + $Script:Icon + '.Cells("PinX").Formula = ' + $PinX
Invoke-Expression $Expression

# Set Icon PinY Properties
$Expression = '$Script:Icon' + $Script:Icon + '.Cells("PinY").Formula = ' + $PinY
Invoke-Expression $Expression

# Set Icon Text
If ($Text)
	{
		$Expression = '$Script:Icon' + $Script:Icon + '.Text = "' + $Text + '"'
		Invoke-Expression $Expression
	}

# Set Icon Char.Size Properties
If ($CharSize)
	{
		$Expression = '$Script:Icon' + $Script:Icon + '.Cells("Char.Size").Formula = "' + $CharSize + '"'
		Invoke-Expression $Expression
	}
}

Resize-VisioPageToFitContents

Funkcja Resize-VisioPageToFitContents jest niezwykle prosta – jej zadaniem jest dopasowanie rozmiaru strony do wymiarów rysunku. Funkcja nie posiada parametrów wejściowych.

Function Resize-VisioPageToFitContents {

#######################################################################
#
# Powershell function for Resize Active Visio Document Page to Fit Contents
#  
# Version:        0.1
# Author:         Andrii Romanenko
# Website:        blogs.airra.net
# Creation Date:  17.09.2007
# Purpose/Change: Initial script development
#
# Run:
#   
# Resize-VisioPageToFitContents
#
#######################################################################

# Resize Page to Fit Contents
$Script:Page.ResizeToFitContents()
}

Save-VisioDocument

Pozostały drobne, końcowe kroki. Logika funkcji Save-VisioDocument polega na zapisaniu utworzonej diagramu w postaci pliku Visio .vsd. Funkcja posiada obowiązkowy parametr File – nazwa pliku Visio .vsd.

Function Save-VisioDocument ($File) {

#######################################################################
#
# Powershell function for save Visio Document
#  
# Version:        0.1
# Author:         Andrii Romanenko
# Website:        blogs.airra.net
# Creation Date:  17.09.2007
# Purpose/Change: Initial script development
#
# Run:
#   
# Save-VisioDocument -File 'C:\!\MsSCVMM2007Arch.vsd'
#
#######################################################################

# Save Document
$Expression = '$Script:Document.SaveAs("' + $File + '")'
Invoke-Expression $Expression
}

Close-VisioApplication 

Kończy tę linię narracyjną funkcja Close-VisioApplication. Nie posiada parametrów, a jej logika polega wyłącznie na zamknięciu aplikacji Visio.

Function Close-VisioApplication {

#######################################################################
#
# Powershell function for create Visio Application
#  
# Version:        0.1
# Author:         Andrii Romanenko
# Website:        blogs.airra.net
# Creation Date:  17.09.2007
# Purpose/Change: Initial script development
#
# Run:
#   
# Close-VisioApplication
#
#######################################################################

# Close Visio Application
$Script:Application.Quit()
}

PSVisio.ps1


Ostateczny rezultat kodu funkcji w pliku PSVisio.ps1 wygląda następująco:  

#######################################################################
#
# Powershell functions for operate Visio Drawing
#  
# Version:        0.1
# Author:         Andrii Romanenko
# Website:        blogs.airra.net
# Creation Date:  14.09.2007
# Purpose/Change: Initial script development.
# Create function New-VisioApplication.
#
# Version:        0.2
# Author:         Andrii Romanenko
# Website:        blogs.airra.net
# Change Date:    14.09.2007
# Purpose/Change: Create function New-VisioDocument.
#
# Version:        0.3
# Author:         Andrii Romanenko
# Website:        blogs.airra.net
# Change Date:    14.09.2007
# Purpose/Change: Create function Set-VisioPage.
#
# Version:        0.4
# Author:         Andrii Romanenko
# Website:        blogs.airra.net
# Change Date:    15.09.2007
# Purpose/Change: Create function Add-VisioStensil.
#
# Version:        0.5
# Author:         Andrii Romanenko
# Website:        blogs.airra.net
# Change Date:    15.09.2007
# Purpose/Change: Create function Set-VisioStensilMasterItem.
#
# Version:        0.6
# Author:         Andrii Romanenko
# Website:        blogs.airra.net
# Change Date:    15.09.2007
# Purpose/Change: Create function Draw-VisioItem.
#
# Version:        0.7
# Author:         Andrii Romanenko
# Website:        blogs.airra.net
# Change Date:    15.09.2007
# Purpose/Change: Create function Draw-VisioLine.
#
# Version:        0.8
# Author:         Andrii Romanenko
# Website:        blogs.airra.net
# Creation Date:  16.09.2007
# Purpose/Change: Change function Draw-VisioItem.
#
# Version:        0.9
# Author:         Andrii Romanenko
# Website:        blogs.airra.net
# Change Date:    16.09.2007
# Purpose/Change: Create function Draw-VisioIcon.
#
# Version:        0.10
# Author:         Andrii Romanenko
# Website:        blogs.airra.net
# Change Date:    17.09.2007
# Purpose/Change: Change function Draw-VisioIcon.
#
# Version:        0.11
# Author:         Andrii Romanenko
# Website:        blogs.airra.net
# Change Date:    17.09.2007
# Purpose/Change: Change function Draw-VisioLine.
#
# Version:        0.12
# Author:         Andrii Romanenko
# Website:        blogs.airra.net
# Change Date:    17.09.2007
# Purpose/Change: Change function Set-VisioStensilMasterItem.
#
# Version:        0.13
# Author:         Andrii Romanenko
# Website:        blogs.airra.net
# Change Date:    17.09.2007
# Purpose/Change: Change function Draw-VisioItem.
#
# Version:        0.14
# Author:         Andrii Romanenko
# Website:        blogs.airra.net
# Change Date:    17.09.2007
# Purpose/Change: Add function Resize-VisioPageToFitContents.
#
# Version:        0.15
# Author:         Andrii Romanenko
# Website:        blogs.airra.net
# Change Date:    17.09.2007
# Purpose/Change: Add function Save-VisioDocument.
#
#
# Version:        0.16
# Author:         Andrii Romanenko
# Website:        blogs.airra.net
# Change Date:    18.09.2007
# Purpose/Change: Add function Draw-VisioText.
#
# Version:        0.17
# Author:         Andrii Romanenko
# Website:        blogs.airra.net
# Change Date:    18.09.2007
# Purpose/Change: Add function Draw-VisioPolyLine.
#
# Version:        0.18
# Author:         Andrii Romanenko
# Website:        blogs.airra.net
# Change Date:    19.09.2007
# Purpose/Change: Change function Draw-VisioText.
#
# Run:
#   
# . .\PSVisio.ps1
#
#######################################################################

# Set Variables
$Shape=0
$Line=0
$Icon=0
$Text=0
$PolyLine=0

Function New-VisioApplication {

#######################################################################
#
# Powershell function for create Visio Application
#  
# Version:        0.1
# Author:         Andrii Romanenko
# Website:        blogs.airra.net
# Creation Date:  14.09.2007
# Purpose/Change: Initial script development
#
# Run:
#   
# New-VisioApplication
#
#######################################################################

# Create Visio Object
$Script:Application = New-Object -ComObject Visio.Application
$Script:Application.Visible = $True
}

Function New-VisioDocument {

#######################################################################
#
# Powershell function for create Visio Document
#  
# Version:        0.1
# Author:         Andrii Romanenko
# Website:        blogs.airra.net
# Creation Date:  14.09.2007
# Purpose/Change: Initial script development
#
# Run:
#   
# New-VisioDocument
#
#######################################################################

# Create Document from Blank Template
$Script:Documents = $Script:Application.Documents
$Script:Document=$Script:Application.Documents.Add('')
}

Function Set-VisioPage {

#######################################################################
#
# Powershell function for Set Active Visio Document Page
#  
# Version:        0.1
# Author:         Andrii Romanenko
# Website:        blogs.airra.net
# Creation Date:  14.09.2007
# Purpose/Change: Initial script development
#
# Run:
#   
# Set-VisioPage
#
#######################################################################

# Set Visio Active Page
$Script:Page=$Script:Application.ActivePage
$Script:Application.ActivePage.PageSheet
}

Function Add-VisioStensil ($Name, $File) {

#######################################################################
#
# Powershell function for Add Visio Stensil
#  
# Version:        0.1
# Author:         Andrii Romanenko
# Website:        blogs.airra.net
# Creation Date:  15.09.2007
# Purpose/Change: Initial script development
#
# Run:
#   
# Add-VisioStensil -Name "Basic" -File "BASIC_M.vss"
#
#######################################################################

# Set Expression and Add Visio Stensil
$Expression = '$Script:' + $Name + ' = $Script:Application.Documents.Add("' + $File +'")'
Invoke-Expression $Expression
}

Function Set-VisioStensilMasterItem ($Stensil, $Item) {

#######################################################################
#
# Powershell function for Set Stensil Master Item
#  
# Version:        0.1
# Author:         Andrii Romanenko
# Website:        blogs.airra.net
# Creation Date:  15.09.2007
# Purpose/Change: Initial script development
#
# Version:        0.2
# Author:         Andrii Romanenko
# Website:        blogs.airra.net
# Creation Date:  17.09.2007
# Purpose/Change: Reorganize Variables
#
# Run:
#   
# Set-VisioStensilMasterItem -Stensil "Basic" -Item "Rectangle"
#
#######################################################################

# Set Expression And Set Masters Item Rectangle
$ItemWithoutSpace = $Item -replace " ",""
$Expression = '$Script:' + $ItemWithoutSpace + ' = $Script:' + $Stensil + '.Masters.Item("' + $Item + '")'
Invoke-Expression $Expression
}

Function Draw-VisioItem ($Master, $X, $Y, $Width, $Height, $FillForegnd, $LinePattern, $Text, $VerticalAlign, $ParaHorzAlign, $CharSize, $CharColor) {

#######################################################################
#
# Powershell function for Draw Visio Item
#  
# Version:        0.1
# Author:         Andrii Romanenko
# Website:        blogs.airra.net
# Creation Date:  15.09.2007
# Purpose/Change: Initial script development
#
# Version:        0.2
# Author:         Andrii Romanenko
# Website:        blogs.airra.net
# Creation Date:  16.09.2007
# Purpose/Change: Add Flow Control Input Parameters
#
# Version:        0.3
# Author:         Andrii Romanenko
# Website:        blogs.airra.net
# Creation Date:  17.09.2007
# Purpose/Change: Reorganize Variables
#
# Run:
#   
# Draw-VisioItem -Master "Rectangle" -X 6.375 -Y 7.125 -Width 12.2501 -Height 7.25 -FillForegnd "RGB(0,153,204)"`
# -LinePattern 0 -Text "Microsoft Virtual Machine Manager Architecture" -VerticalAlign 0 -ParaHorzAlign 0`
# -CharSize "20 pt" -CharColor "RGB(255,255,255)"
#
#######################################################################

$Script:Shape++
$Master = $Master -replace " ",""

# Set Expression And Draw Item
$Expression = '$Script:Shape' + $Script:Shape + ' = $Script:Page.Drop(' + '$' + $Master + ',' + $X + ',' + $Y + ')'
Invoke-Expression $Expression

# Set Item Width Properties
If ($Width)
	{
		$Expression = '$Script:Shape' + $Script:Shape + '.Cells("Width").Formula = ' + $Width
		Invoke-Expression $Expression
	}

# Set Item Height Properties
If ($Height)
	{
		$Expression = '$Script:Shape' + $Script:Shape + '.Cells("Height").Formula = ' + $Height
		Invoke-Expression $Expression
	}

# Set Item FillForegnd Properties
If ($FillForegnd)
	{
		$Expression = '$Script:Shape' + $Script:Shape + '.Cells("FillForegnd").Formula = "=' +  $FillForegnd + '"'
		Invoke-Expression $Expression
	}

# Set Item LinePattern Properties
If ($LinePattern)
	{
		$Expression = '$Script:Shape' + $Script:Shape + '.Cells("LinePattern").Formula = ' + $LinePattern
		Invoke-Expression $Expression
	}

# Set Item Text
If ($Text)
	{
		$Expression = '$Script:Shape' + $Script:Shape + '.Text = "' + $Text + '"'
		Invoke-Expression $Expression
	}

# Set Item VerticalAlign Properties
If ($VerticalAlign)
	{
		$Expression = '$Script:Shape' + $Script:Shape + '.Cells("VerticalAlign").Formula = ' + $VerticalAlign
		Invoke-Expression $Expression
	}

# Set Item HorzAlign Properties
If ($ParaHorzAlign)
	{
		$Expression = '$Script:Shape' + $Script:Shape + '.Cells("Para.HorzAlign").Formula = ' + $ParaHorzAlign
		Invoke-Expression $Expression
	}

# Set Item Char.Size Properties
If ($CharSize)
	{
		$Expression = '$Script:Shape' + $Script:Shape + '.Cells("Char.Size").Formula = "' + $CharSize + '"'
		Invoke-Expression $Expression
	}

# Set Item Char.Color Properties
If ($CharColor)
	{
		$Expression = '$Script:Shape' + $Script:Shape + '.Cells("Char.Color").Formula = "=' +  $CharColor + '"'
		Invoke-Expression $Expression
	}
}

Function Draw-VisioLine ($BeginX, $BeginY, $EndX, $EndY, $LineWeight, $LineColor, $BeginArrow, $EndArrow) {

#######################################################################
#
# Powershell function for Draw Visio Line
#  
# Version:        0.1
# Author:         Andrii Romanenko
# Website:        blogs.airra.net
# Creation Date:  15.09.2007
# Purpose/Change: Initial script development
#
# Version:        0.2
# Author:         Andrii Romanenko
# Website:        blogs.airra.net
# Creation Date:  17.09.2007
# Purpose/Change: Add Flow Control Input Parameters
#
# Run:
#   
# Draw-VisioLine -BeginX 0.3125 -BeginY 10.3438 -EndX 12.4948 -EndY 10.3438 -LineWeight "1 pt"`
# -LineColor "RGB(255,255,255)" -BeginArrow 4 -EndArrow 4
#
#######################################################################

$Script:Line++

# Set Expression And Draw Line
$Expression = '$Script:Line' + $Script:Line + ' = $Script:Page.DrawLine(' + $BeginX + ',' + $BeginY + ',' + $EndX + ',' + $EndY + ')'
Invoke-Expression $Expression

# Set Line Width Properties
If ($LineWeight)
	{
		$Expression = '$Script:Line' + $Script:Line + '.Cells("LineWeight").Formula = "' + $LineWeight + '"'
		Invoke-Expression $Expression
	}

# Set Line Color Properties
$Expression = '$Script:Line' + $Script:Line + '.Cells("LineColor").Formula = "=' +  $LineColor + '"'
Invoke-Expression $Expression

# Set Line Begin Arrow Properties
If ($BeginArrow)
	{
		$Expression = '$Script:Line' + $Script:Line + '.Cells("BeginArrow").Formula = ' + $BeginArrow
		Invoke-Expression $Expression
	}

# Set Line End Arrow Properties
If ($EndArrow)
	{
		$Expression = '$Script:Line' + $Script:Line + '.Cells("EndArrow").Formula = ' + $EndArrow
		Invoke-Expression $Expression
	}
}

Function Draw-VisioIcon ($IconPath, $Width, $Height, $PinX, $PinY, $Text, $CharSize) {

#######################################################################
#
# Powershell function for Draw Visio Icon
#  
# Version:        0.1
# Author:         Andrii Romanenko
# Website:        blogs.airra.net
# Creation Date:  16.09.2007
# Purpose/Change: Initial script development
#
# Version:        0.2
# Author:         Andrii Romanenko
# Website:        blogs.airra.net
# Creation Date:  17.09.2007
# Purpose/Change: Add Flow Control Input Parameters
#
# Run:
#   
# Draw-VisioIcon -IconPath "c:\!\powershell.png" -Width 0.9843 -Height 0.9843 -PinX 2.5547 -PinY 9.2682`
# -Text "Windows Powershell" -CharSize "10 pt"
#
#######################################################################

$Script:Icon++

# Import Icon Item
$Expression = '$Script:Icon' + $Script:Icon + ' = $Script:Page.Import("' + $IconPath + '")'
Invoke-Expression $Expression

# Set Icon Width Properties
$Expression = '$Script:Icon' + $Script:Icon + '.Cells("Width").Formula = ' + $Width
Invoke-Expression $Expression

# Set Icon Height Properties
$Expression = '$Script:Icon' + $Script:Icon + '.Cells("Height").Formula = ' + $Height
Invoke-Expression $Expression

# Set Icon PinX Properties
$Expression = '$Script:Icon' + $Script:Icon + '.Cells("PinX").Formula = ' + $PinX
Invoke-Expression $Expression

# Set Icon PinY Properties
$Expression = '$Script:Icon' + $Script:Icon + '.Cells("PinY").Formula = ' + $PinY
Invoke-Expression $Expression

# Set Icon Text
If ($Text)
	{
		$Expression = '$Script:Icon' + $Script:Icon + '.Text = "' + $Text + '"'
		Invoke-Expression $Expression
	}

# Set Icon Char.Size Properties
If ($CharSize)
	{
		$Expression = '$Script:Icon' + $Script:Icon + '.Cells("Char.Size").Formula = "' + $CharSize + '"'
		Invoke-Expression $Expression
	}
}

Function Resize-VisioPageToFitContents {

#######################################################################
#
# Powershell function for Resize Active Visio Document Page to Fit Contents
#  
# Version:        0.1
# Author:         Andrii Romanenko
# Website:        blogs.airra.net
# Creation Date:  17.09.2007
# Purpose/Change: Initial script development
#
# Run:
#   
# Resize-VisioPageToFitContents
#
#######################################################################

# Resize Page to Fit Contents
$Script:Page.ResizeToFitContents()
}

Function Save-VisioDocument ($File) {

#######################################################################
#
# Powershell function for save Visio Document
#  
# Version:        0.1
# Author:         Andrii Romanenko
# Website:        blogs.airra.net
# Creation Date:  17.09.2007
# Purpose/Change: Initial script development
#
# Run:
#   
# Save-VisioDocument -File 'C:\!\MsSCVMM2007Arch.vsd'
#
#######################################################################

# Save Document
$Expression = '$Script:Document.SaveAs("' + $File + '")'
Invoke-Expression $Expression
}

Function Close-VisioApplication {

#######################################################################
#
# Powershell function for create Visio Application
#  
# Version:        0.1
# Author:         Andrii Romanenko
# Website:        blogs.airra.net
# Creation Date:  17.09.2007
# Purpose/Change: Initial script development
#
# Run:
#   
# Close-VisioApplication
#
#######################################################################

# Close Visio Application
$Script:Application.Quit()
}

Function Draw-VisioText ($X, $Y, $Width, $Height, $FillForegnd, $LinePattern, $Text, $VerticalAlign, $ParaHorzAlign, $CharSize, $CharColor, $CharStyle, $FillForegndTrans) {

#######################################################################
#
# Powershell function for Draw Visio Text Label
#  
# Version:        0.1
# Author:         Andrii Romanenko
# Website:        blogs.airra.net
# Creation Date:  18.09.2007
# Purpose/Change: Initial script development
#
# Version:        0.2
# Author:         Andrii Romanenko
# Website:        blogs.airra.net
# Creation Date:  19.09.2007
# Purpose/Change: Add CharStyle Parameter
#
# Run:
#   
# Draw-VisioText -X 4.25 -Y 8.875 -Width 1.3751 -Height 0.375 -Text "Microsoft Virtual Machine Manager Architecture"`
# -LinePattern "0" -FillForegndTrans "100%" -CharStyle 17
#
#######################################################################

$Script:Text++
$Master = "Rectangle"

# Set Expression And Draw Text
$Expression = '$Script:Text' + $Script:Text + ' = $Script:Page.Drop(' + '$' + $Master + ',' + $X + ',' + $Y + ')'
Invoke-Expression $Expression

# Set Item Width Properties
If ($Width)
	{
		$Expression = '$Script:Text' + $Script:Text + '.Cells("Width").Formula = ' + $Width
		Invoke-Expression $Expression
	}

# Set Item Height Properties
If ($Height)
	{
		$Expression = '$Script:Text' + $Script:Text + '.Cells("Height").Formula = ' + $Height
		Invoke-Expression $Expression
	}

# Set Item FillForegnd Properties
If ($FillForegnd)
	{
		$Expression = '$Script:Text' + $Script:Text + '.Cells("FillForegnd").Formula = "=' +  $FillForegnd + '"'
		Invoke-Expression $Expression
	}

# Set Item LinePattern Properties
If ($LinePattern)
	{
		$Expression = '$Script:Text' + $Script:Text + '.Cells("LinePattern").Formula = ' + $LinePattern
		Invoke-Expression $Expression
	}

# Set Item Text
If ($Text)
	{
		$Expression = '$Script:Text' + $Script:Text + '.Text = "' + $Text + '"'
		Invoke-Expression $Expression
	}

# Set Item VerticalAlign Properties
If ($VerticalAlign)
	{
		$Expression = '$Script:Text' + $Script:Text + '.Cells("VerticalAlign").Formula = ' + $VerticalAlign
		Invoke-Expression $Expression
	}

# Set Item HorzAlign Properties
If ($ParaHorzAlign)
	{
		$Expression = '$Script:Text' + $Script:Text + '.Cells("Para.HorzAlign").Formula = ' + $ParaHorzAlign
		Invoke-Expression $Expression
	}

# Set Item Char.Size Properties
If ($CharSize)
	{
		$Expression = '$Script:Text' + $Script:Text + '.Cells("Char.Size").Formula = "' + $CharSize + '"'
		Invoke-Expression $Expression
	}

# Set Item Char.Color Properties
If ($CharColor)
	{
		$Expression = '$Script:Text' + $Script:Text + '.Cells("Char.Color").Formula = "=' +  $CharColor + '"'
		Invoke-Expression $Expression
	}
	
# Set Item Char.Style Properties
If ($CharStyle)
	{
		$Expression = '$Script:Text' + $Script:Text + '.Cells("Char.Style").Formula = "' + $CharStyle + '"'
		Invoke-Expression $Expression
	}
	
# Set Item FillForegndTrans Properties
If ($FillForegndTrans)
	{
		$Expression = '$Script:Text' + $Script:Text + '.Cells("FillForegndTrans").Formula = "' + $FillForegndTrans + '"'
		Invoke-Expression $Expression
	}		
}

Function Draw-VisioPolyLine ($PolyLine, $LineWeight, $LineColor, $BeginArrow, $EndArrow) {

#######################################################################
#
# Powershell function for Draw Visio PolyLine
#  
# Version:        0.1
# Author:         Andrii Romanenko
# Website:        blogs.airra.net
# Creation Date:  18.09.2007
# Purpose/Change: Initial script development
#
# Run:
#   
# Draw-VisioPolyLine -Polyline 1.0938,9.0625,1.4063,9.0625,1.4063,8.6563,1.0938,8.6563 -LineWeight "0.5 pt"`
# -LineColor "RGB(255,255,255)" -BeginArrow 1 -EndArrow 1
#
#######################################################################

$Script:PolyLine++
[double[]]$PolyLineCoordinates=@()
$PolyLineCoordinates += $Polyline

# Set Expression And Draw PolyLine
$Expression = '$Script:PolyLine' + $Script:PolyLine + ' = $Script:Page.DrawPolyLine(($PolyLineCoordinates),0)'
Invoke-Expression $Expression

# Set Line Width Properties
If ($LineWeight)
	{
		$Expression = '$Script:PolyLine' + $Script:PolyLine + '.Cells("LineWeight").Formula = "' + $LineWeight + '"'
		Invoke-Expression $Expression
	}

# Set Line Color Properties
$Expression = '$Script:PolyLine' + $Script:PolyLine + '.Cells("LineColor").Formula = "=' +  $LineColor + '"'
Invoke-Expression $Expression

# Set Line Begin Arrow Properties
If ($BeginArrow)
	{
		$Expression = '$Script:PolyLine' + $Script:PolyLine + '.Cells("BeginArrow").Formula = ' + $BeginArrow
		Invoke-Expression $Expression
	}

# Set Line End Arrow Properties
If ($EndArrow)
	{
		$Expression = '$Script:PolyLine' + $Script:PolyLine + '.Cells("EndArrow").Formula = ' + $EndArrow
		Invoke-Expression $Expression
	}
}

Aktualna wersja powyższego kodu znajduje się w repozytorium Git pod tym linkiem: PSVisio.ps1.

MsSCVMM2k7ArchDiagramV1.ps1


Odpowiednio, kod tworzenia diagramu architektury systemu Microsoft System Center Virtual Machine Manager 2007 w formacie Visio : 

. .\PSVisio.ps1

# Step 1.
# Create Visio Application
# Create Document from Blank Template
# Set Active Page
New-VisioApplication
New-VisioDocument
Set-VisioPage

# Step 2.
# Add Basic Visio Stensils
# Set Masters Item Rectangle
Add-VisioStensil -Name "Basic" -File "BASIC_M.vss"
Set-VisioStensilMasterItem -Stensil Basic -Item "Rectangle"

# Step 3.
# Draw Main Rectangle, Set Size, Set Colour
# Set Text, Size, Color, Align
# Draw Line, Set Weight, Color
Draw-VisioItem -Master "Rectangle" -X 6.375 -Y 7.125 -Width 12.2501 -Height 7.25 -FillForegnd "RGB(0,153,204)"`
 -LinePattern 0 -Text "Microsoft Virtual Machine Manager Architecture" -VerticalAlign '0' -ParaHorzAlign '0'`
 -CharSize "20 pt" -CharColor "RGB(255,255,255)"
Draw-VisioLine -BeginX 0.3125 -BeginY 10.3438 -EndX 12.4948 -EndY 10.3438 -LineWeight "1 pt" -LineColor "RGB(255,255,255)"
 
# Step 4.
# Draw Client Rectangle, Set Size, Set Colour
# Set Text, Align
# Draw Line
Draw-VisioItem -Master "Rectangle" -X 1.7656 -Y 9.2344 -Width 2.7813 -Height 1.9688 -FillForegnd "RGB(209,235,241)"`
 -LinePattern 1 -Text "Client" -VerticalAlign '0' -ParaHorzAlign '1'`
 -CharSize "14 pt" -CharColor "RGB(0,0,0)"
Draw-VisioLine -BeginX 0.4297 -BeginY 9.9427 -EndX 3.0833 -EndY 9.9427 -LineWeight "0.5 pt" -LineColor "RGB(0,0,0)"

# Step 5.
# Add Computer Items Visio Stensils
# Set Masters item PC
Add-VisioStensil -Name "Computer" -File "COMPS_M.vss"
Set-VisioStensilMasterItem -Stensil "Computer" -Item "PC"

# Step 6.
# Draw item PC
# Set Text, Size
Draw-VisioItem -Master "PC" -X 1.1173 -Y 9.1693 -Text "Administrator Console" -CharSize "10 pt"

# Step 7.
# Draw Powershell Icon
# Set Position, Size
# Set Text
Draw-VisioIcon -IconPath "c:\!\powershell.png" -Width 0.9843 -Height 0.9843 -PinX 2.5547 -PinY 9.2682 `
 -Text "Windows Powershell" -CharSize "10 pt"

# Step 8.
# Draw WCF Rectangle, Set Size, Set Colour
# Set Text, Align
# Draw Line
Draw-VisioItem -Master "Rectangle" -X 4.2682 -Y 6.9063 -Width 1.5 -Height 6.625 -FillForegnd "RGB(255,255,255)"`
 -LinePattern 1 -Text "Windows Communication Foundation" -VerticalAlign '0'`
 -CharSize "14 pt"
Draw-VisioLine -BeginX 3.5664 -BeginY 9.4063 -EndX 4.9492 -EndY 9.4063 -LineWeight "0.5 pt" -LineColor "RGB(0,0,0)"

# Step 9.----
# Draw WCF Icon
# Set Position, Size
Draw-VisioIcon -IconPath "c:\!\WCF.png" -Width 1.412 -Height 1.0443 -PinX 4.2708 -PinY 6.9779

# Step 10.
# Draw Line communication from Client to WCF
# Set Arrow
Draw-VisioLine -BeginX 3.1563 -BeginY 9.2396 -EndX 3.5174 -EndY 9.2396 -LineColor "RGB(255,255,255)" -BeginArrow 4 -EndArrow 4

# Step 11.
# Draw Web Client Rectangle, Set Size, Set Colour
# Set Text, Align
# Draw Line
Draw-VisioItem -Master "Rectangle" -X 1.7656 -Y 6.8776 -Width 2.7813 -Height 2.1094 -FillForegnd "RGB(209,235,241)"`
 -LinePattern 1 -Text "Web Client" -VerticalAlign '0'`
 -CharSize "14 pt"
Draw-VisioLine -BeginX 0.4297 -BeginY 7.6562 -EndX 3.0833 -EndY 7.6562 -LineWeight "0.5 pt" -LineColor "RGB(0,0,0)"

# Step 12.
# Draw Self Service Portal Icon
# Set Position, Size
# Set Text
Draw-VisioIcon -IconPath "c:\!\SelfServicePortal.png" -Width 0.8438 -Height 0.8438 -PinX 1.1094 -PinY 6.9271 `
 -Text "Self Service Portal" -CharSize "10 pt"

# Step 13.
# Draw Powershell Icon
# Set Position, Size
# Set Text
Draw-VisioIcon -IconPath "c:\!\powershell.png" -Width 0.9843 -Height 0.9843 -PinX 2.4922 -PinY 6.9192 `
 -Text "Windows Powershell" -CharSize "10 pt"

# Step 14.
# Draw Line communication from Web Client to WCF
# Set Arrow
Draw-VisioLine -BeginX 3.158 -BeginY 6.8802 -EndX 3.5191 -EndY 6.8802 -LineColor "RGB(255,255,255)" -BeginArrow 4 -EndArrow 4

# Step 15.
# Draw Scripting Client Rectangle, Set Size, Set Colour
# Set Text, Align
# Draw Line
Draw-VisioItem -Master "Rectangle" -X 1.7657 -Y 4.5469 -Width 2.7813 -Height 1.9062 -FillForegnd "RGB(209,235,241)"`
 -LinePattern 1 -Text "Scripting Client" -VerticalAlign '0'`
 -CharSize "14 pt"
Draw-VisioLine -BeginX 0.4297 -BeginY 5.1979 -EndX 3.0834 -EndY 5.1979 -LineWeight "0.5 pt" -LineColor "RGB(0,0,0)"

# Step 16.
# Draw Powershell Icon
# Set Position, Size
# Set Text
Draw-VisioIcon -IconPath "c:\!\powershell.png" -Width 0.9843 -Height 0.9843 -PinX 1.7631 -PinY 4.6015 `
 -Text "Windows Powershell" -CharSize "10 pt"

# Step 17.
# Draw Line communication from Scripting Client to WCF
# Set Arrow
Draw-VisioLine -BeginX 3.158 -BeginY 4.5729 -EndX 3.5191 -EndY 4.5729 -LineColor "RGB(255,255,255)" -BeginArrow 4 -EndArrow 4

# Step 18.
# Draw Microsoft System Center
# Virtual Machine Manager Server 2007 Rectangle
# Set Size, Set Colour
# Set Text, Align
Draw-VisioItem -Master "Rectangle" -X 6.3281 -Y 8.2812 -Width 1.5 -Height 2.8125 -FillForegnd "RGB(255,192,0)"`
 -LinePattern 1 -Text "Microsoft System Center Virtual Machine Manager Server 2007" -CharSize "14 pt"

# Step 19.
# Draw Microsoft SQL Server 2005 Rectangle
# Set Size, Set Colour
# Set Text, Align
Draw-VisioItem -Master "Rectangle" -X 6.3281 -Y 4.9219 -Width 1.5 -Height 2.6563 -FillForegnd "RGB(255,192,0)"`
 -LinePattern 1 -Text "Microsoft SQL Server 2005" -CharSize "14 pt"

# Step 20.
# Add Server Items Visio Stensils
# Set Masters item Management Server and Database Server
Add-VisioStensil -Name "Server" -File "SERVER_M.vss"
Set-VisioStensilMasterItem -Stensil "Server" -Item "Management server"
Set-VisioStensilMasterItem -Stensil "Server" -Item "Database server"

# Step 21.
# Draw item Management Server
Draw-VisioItem -Master "Management server" -X 5.6043 -Y 9.7421

# Step 22.
# Draw item Management Server
Draw-VisioItem -Master "Database server" -X 5.5832 -Y 6.3046

# Step 23.
# Draw Line communication from WCF to Microsoft System Center
# Virtual Machine Manager Server 2007
# Set Arrow
Draw-VisioLine -BeginX 5.0052 -BeginY 8.2604 -EndX 5.6024 -EndY 8.2604 -LineColor "RGB(255,255,255)" -BeginArrow 4 -EndArrow 4

# Step 24.
# Draw Line communication from Microsoft System Center
# Virtual Machine Manager Server 2007 to Microsoft SQL Server 2005
# Set Arrow
Draw-VisioLine -BeginX 6.3272 -BeginY 6.2344 -EndX 6.3272 -EndY 6.8802 -LineColor "RGB(255,255,255)" -BeginArrow 4 -EndArrow 0

# Step 25.
# Draw Win-RM Rectangle, Set Size, Set Colour
# Set Text, Align
# Draw Line
Draw-VisioItem -Master "Rectangle" -X 8.4375 -Y 6.9219 -Width 1.5 -Height 6.6563 -FillForegnd "RGB(255,255,255)"`
 -LinePattern 1 -Text "Windows Remote Managemet (Win-RM)" -VerticalAlign '0'`
 -CharSize "14 pt"
Draw-VisioLine -BeginX 7.75 -BeginY 9.1875 -EndX 9.1328 -EndY 9.1875 -LineWeight "0.5 pt" -LineColor "RGB(0,0,0)"

# Step 26.
# Draw Win-RM Icon
# Set Position, Size
Draw-VisioIcon -IconPath "c:\!\Win-RM.png" -Width 1.1563 -Height 1.1563 -PinX 8.4293 -PinY 7

# Step 27.
# Draw Line communication from Win-RM to Microsoft System Center
# Virtual Machine Manager Server 2007
# Set Arrow
Draw-VisioLine -BeginX 7.0781 -BeginY 8.2812 -EndX 7.6753 -EndY 8.2812 -LineColor "RGB(255,255,255)" -BeginArrow 4 -EndArrow 4

# Step 28.
# Draw P2V Source Rectangle, Set Size, Set Colour
# Set Text, Align
# Draw Line
Draw-VisioItem -Master "Rectangle" -X 10.9844 -Y 9.5 -Width 2.7813 -Height 1.5 -FillForegnd "RGB(209,235,241)"`
 -LinePattern 1 -Text "P2V Source" -VerticalAlign '0'`
 -CharSize "14 pt"
Draw-VisioLine -BeginX 9.6485 -BeginY 9.9739 -EndX 12.3021 -EndY 9.9739 -LineWeight "0.5 pt" -LineColor "RGB(0,0,0)"

# Step 29.
# Draw VMM Agent Icon
# Set Position, Size
# Set Text
Draw-VisioIcon -IconPath "c:\!\VMMAgent.png" -Width 0.8438 -Height 0.8438 -PinX 10.2969 -PinY 9.5 `
 -Text "VMM Agent" -CharSize "10 pt"

# Step 30.
# Draw Powershell Icon
# Set Position, Size
# Set Text
Draw-VisioIcon -IconPath "c:\!\powershell.png" -Width 0.7968 -Height 0.7968 -PinX 11.6016 -PinY 9.6016 `
 -Text "Windows Powershell" -CharSize "10 pt"

# Step 31.
# Draw Line communication from P2V Source to Win-RM
# Set Arrow
Draw-VisioLine -BeginX 9.1875 -BeginY 9.487 -EndX 9.599 -EndY 9.487 -LineColor "RGB(255,255,255)" -BeginArrow 4 -EndArrow 4

# Step 32.
# Draw Host Rectangle, Set Size, Set Colour
# Set Text, Align
# Draw Line
Draw-VisioItem -Master "Rectangle" -X 10.9792 -Y 6.9427 -Width 2.7813 -Height 1.5 -FillForegnd "RGB(209,235,241)"`
 -LinePattern 1 -Text "Host" -VerticalAlign '0'`
 -CharSize "14 pt"
Draw-VisioLine -BeginX 9.6472 -BeginY 7.4219 -EndX 12.3008 -EndY 7.4219 -LineWeight "0.5 pt" -LineColor "RGB(0,0,0)"

# Step 33.
# Draw VMM Agent Icon
# Set Position, Size
# Set Text
Draw-VisioIcon -IconPath "c:\!\VMMAgent.png" -Width 0.8438 -Height 0.8438 -PinX 10.2917 -PinY 6.9427 `
 -Text "VMM Agent" -CharSize "10 pt"

# Step 34.
# Draw Microsoft Virtual Server 2005 R2 Icon
# Set Position, Size
# Set Text
Draw-VisioIcon -IconPath "c:\!\WS.jpg" -Width 0.8125 -Height 0.7404 -PinX 11.5938 -PinY 6.9423 `
 -Text "Microsoft Virtual Server 2005 R2" -CharSize "7 pt"

# Step 35.
# Draw Line communication from Host to Win-RM
# Set Arrow
Draw-VisioLine -BeginX 9.1849 -BeginY 6.941 -EndX 9.5964 -EndY 6.941 -LineColor "RGB(255,255,255)" -BeginArrow 4 -EndArrow 4

# Step 36.
# Draw Library Rectangle, Set Size, Set Colour
# Set Text, Align
# Draw Line
Draw-VisioItem -Master "Rectangle" -X 10.9792 -Y 4.3542 -Width 2.7813 -Height 1.5 -FillForegnd "RGB(209,235,241)"`
 -LinePattern 1 -Text "Library" -VerticalAlign '0'`
 -CharSize "14 pt"
Draw-VisioLine -BeginX 9.6419 -BeginY 4.8073 -EndX 12.2955 -EndY 4.8073 -LineWeight "0.5 pt" -LineColor "RGB(0,0,0)"

# Step 37.
# Draw VMM Agent Icon
# Set Position, Size
# Set Text
Draw-VisioIcon -IconPath "c:\!\VMMAgent.png" -Width 0.8438 -Height 0.8438 -PinX 10.2917 -PinY 4.3542 `
 -Text "VMM Agent" -CharSize "10 pt"

# Step 38.
# Draw Windows Server 2003 R2 Icon
# Set Position, Size
# Set Text
Draw-VisioIcon -IconPath "c:\!\WS.jpg" -Width 0.8125 -Height 0.7404 -PinX 11.5625 -PinY 4.3702 `
 -Text "Windows Server 2003 R2" -CharSize "7 pt"

# Step 39.
# Draw Line communication from Library to Win-RM
# Set Arrow
Draw-VisioLine -BeginX 9.1901 -BeginY 4.3611 -EndX 9.6016 -EndY 4.3611 -LineColor "RGB(255,255,255)" -BeginArrow 4 -EndArrow 4

# Step 40.
# Draw BITS Rectangle, Set Size, Set Colour
# Set Text, Align
# Draw Line
Draw-VisioItem -Master "Rectangle" -X 10.9844 -Y 8.2292 -Width 2.75 -Height 0.5625 -FillForegnd "RGB(255,255,0)"`
 -LinePattern 1 -Text "BITS" -ParaHorzAlign '0'`
 -CharSize "14 pt"

# Step 41.
# Draw BITS Icon
# Set Position, Size
# Set Text
Draw-VisioIcon -IconPath "c:\!\BITS.jpg" -Width 0.5417 -Height 0.5417 -PinX 10.974 -PinY 8.2344

# Step 42.
# Draw Line communication from BITS to P2V Source
# Set Arrow
Draw-VisioLine -BeginX 10.9844 -BeginY 8.5104 -EndX 10.9844 -EndY 8.75 -LineColor "RGB(255,255,255)" -BeginArrow 4 -EndArrow 4

# Step 43.
# Draw Line communication from BITS to Host
# Set Arrow
Draw-VisioLine -BeginX 10.9844 -BeginY 7.6849 -EndX 10.9844 -EndY 7.9219 -LineColor "RGB(255,255,255)" -BeginArrow 4 -EndArrow 4

# Step 44.
# Draw BITS Rectangle, Set Size, Set Colour
# Set Text, Align
# Draw Line
Draw-VisioItem -Master "Rectangle" -X 10.9844 -Y 5.6555 -Width 2.75 -Height 0.5625 -FillForegnd "RGB(255,255,0)"`
 -LinePattern 1 -Text "BITS" -ParaHorzAlign '0'`
 -CharSize "14 pt"

# Step 45.
# Draw BITS Icon
# Set Position, Size
# Set Text
Draw-VisioIcon -IconPath "c:\!\BITS.jpg" -Width 0.5417 -Height 0.5417 -PinX 10.974 -PinY 5.6607

# Step 46.
# Draw Line communication from BITS to Host 
# Set Arrow
Draw-VisioLine -BeginX 10.9844 -BeginY 5.9245 -EndX 10.9844 -EndY 6.1901 -LineColor "RGB(255,255,255)" -BeginArrow 4 -EndArrow 4

# Step 47.
# Draw Line communication from BITS to Library
# Set Arrow
Draw-VisioLine -BeginX 10.9792 -BeginY 5.1042 -EndX 10.9792 -EndY 5.375 -LineColor "RGB(255,255,255)" -BeginArrow 4 -EndArrow 4

# Step 48.
# Resise Page To Fit Contents
Resize-VisioPageToFitContents

# Step 49.
# Save Document
# And Quit Application
Save-VisioDocument -File 'C:\!\MsSCVMM2007Arch.vsd'
Close-VisioApplication

Aktualna wersja powyższego kodu znajduje się w repozytorium Git pod tym linkiem: MsSCVMM2k7ArchDiagramV1.ps1.

Короткий Підсумок.


Отже фінальний результат повністю аналогічний описаному в попередніх публікаціях, проте оптимізація за допомогою функцій дозволила скоротити об’єм коду з 516 рядків до 326.  Код став більш оптимальним і читабельним. Позитивним фактором також являється стратегія повторного використання коду.  

Проте залишаються ще задачі до реалізації: функції мають мати код перевірки вхідних параметрів на коректність, і додати і розширити алгоритми роботи із більш складними фігурами. 

Але про це вже в наступних публікаціях. 

До зустрічі. 

З повагою, AIRRA! 

Zaszufladkowano do kategorii Architektura, Kod, Microsoft, Programowanie, Projekt | Otagowano , , , | Dodaj komentarz

Microsoft System Center Virtual Machine Manager 2007 – Podstawa zwirtualizowanego centrum danych. Część 1. Pierwsze spojrzenie. Funkcje ogólne. Integracja. Krótkie Podsumowanie.

Pierwsze spojrzenie


Minęły trzy lata, odkąd Microsoft przejął Connectix. Wreszcie, firma Microsoft udostępnia narzędzie do zarządzania segmentem przedsiębiorstwa dla serwera wirtualnego: Virtual Machine Manager 2007, część rodziny produktów System Center.

Microsoft System Center Virtual Machine Manager 2007 to kompleksowe rozwiązanie do zarządzania zwirtualizowanym centrum danych, które umożliwia zwiększone wykorzystanie fizycznego serwera i scentralizowane zarządzanie infrastrukturą maszyn wirtualnych.

Funkcje ogólne


Pierwsza edycja programu System Center Virtual Machine Manager zawiera następujące funkcje zarządzania infrastrukturą wirtualną:

  • Wsparcie dla cyklu życia działania maszyn wirtualnych;
  • Scentralizowana biblioteka obrazów referencyjnych maszyn wirtualnych, skryptów i obrazów ISO;
  • Szybka i niezawodna konwersja serwera fizycznego na maszynę wirtualną (migracja P2V);
  • Szybka i niezawodna konwersja maszyny wirtualnej na maszynę wirtualną (migracja V2V);
  • Udostępnianie funkcji samoobsługi za pośrednictwem portalu internetowego;
  • Dodatkowe skrypty automatyzacji dzięki integracji z PowerShell;
  • Integracja z System Center Operation Manager 2007 do monitorowania wirtualnego centrum danych i planowania wydajności;
  • Integracja z programem System Center Configuration Manager 2007 w celu aktualizacji maszyn wirtualnych w trybie offline;
  • Integracja z programem System Center Manager Data Protection Manager 2007 w celu tworzenia kopii zapasowych działających maszyn wirtualnych.
Rysunek 1: Konsola administratora programu Virtual Machine Manager.

Integracja


Konsola administratora programu Virtual Machine Manager jest oparta na znanym interfejsie użytkownika programu Operations Manager 2007, dzięki czemu administratorzy mogą szybko i łatwo zarządzać swoimi maszynami wirtualnymi. Kompleksowe monitorowanie stanu hostów, maszyn wirtualnych, serwerów bibliotek i składników programu Virtual Machine Manager jest dostępne w pakiecie Virtualization Management Pack w programie Operations Manager 2007.

Program System Center Virtual Machine Manager jest również zintegrowany ze znanymi narzędziami i technologiami. Na przykład Virtual Machine Manager używa bazy danych SQL Server do przechowywania danych dotyczących wydajności i konfiguracji, podczas gdy funkcje raportowania w programie Virtual Machine Manager korzystają ze znanych technologii usług SQL Reporting Services, ale są udostępniane za pośrednictwem programu System Center Operations Manager.

Krótkie Podsumowanie


Pierwsza wersja Microsoft System Center Virtual Machine Manager 2007 okazała się kompleksowym rozwiązaniem do zarządzania środowiskami wirtualnymi. Integracja z innymi produktami System Center oraz wsparcie PowerShell otwierają szerokie możliwości dla administratorów.

Jednak w nadchodzących publikacjach główny nacisk będzie położony na architekturę SCVMM — od zasad projektowania po optymalne modele wdrażania w infrastrukturach korporacyjnych.

Więcej szczegółów zostanie przedstawionych w kolejnych materiałach.

Do zobaczenia za kilka dni.
Z poważaniem, AIRRA!


Zaszufladkowano do kategorii Microsoft, Retrospektywa, Technologia, Wirtualizacja | Otagowano , , , , , , , , , , , | Dodaj komentarz